Galley Ho!

Today I built up my plumbing box and finalized all the fittings.

Basically the pump is going to mount where you see it above, just under the sink and to the right of the drain, which arrives tomorrow. Only that metal shelf will be gone and the pump will mount atop the water tank.

Here’s a close-up of the box I built. First I turned the drop elbows to face each other and made an 8-inch tee connection. I had to heat the ends of the 1/2″ braided nylon hose to force them over the brass barbs, and I used worm-screw hose clamps just for good measure.

The box is 3/4″ marine plywood left over from the floors. The depth has to be just right, and I also had to avoid some rivets at the bottom. So there is a spacer at the bottom. The large piece is fastened on three sides with 14 Kreg pocket screws. And then the whole box is screwed into the vertical frame ribs with four 2-inch sheet metal screws and washers, to keep it from flopping.

It ain’t goin’ nowhere. This will make the heavy chrome wall faucet feel as sturdy as possible.

I’m keeping the brass nipples and bushings you see here. They’ll protrude through the wall holes by just the right amount: 1/2 inch. To achieve that, there is a 1/4-inch gap in the back.

It turns out I probably won’t use the two 1-inch holes in the horizontal rib, since the water supply hose can route into the galley cabinet above that rib. But it’s nice to have those holes available if I ever changes things around, like to add a separate hot water line or move the pump. The 3/4-inch hole in the left corner is for the pump’s 12V cable, which I’ll branch in tomorrow.

As soon as I hear back from Plastic Mart about my custom fresh water tank, I can cut the holes in the back of the galley cabinet, button up the wall panel and move everything back into place. Then when the water tank arrives in a couple weeks, I can make the final connections from inside the galley cabinet.

Meanwhile, I should be able to fit the drain and the fresh water inlet by Friday. I need to make everything presentable for my kids’ Thanksgiving visit. 🙂

Tanks a Lot

Today I did a face-palm when I realized the RETROvan’s gas tank is directly under the galley, mounted to the chassis. The nearest mounting point for a water tank is a few feet away, under the driver’s seat. And even there the space is limited to about 24″x18″x10″. So that changes my half-baked plans for plumbing the sink with enough fresh water to survive the Trump “presidency.”

I spent the day exploring several interesting options (like a pair of cool portable containers above), and finally settled on this:

It’s a custom fresh water tank to be built by Plastic Mart. The outside dimensions of 15x15x15″ allow for a capacity of about 13.5 gallons. That may not seem like a lot of water but remember, we don’t have a toilet or a shower to worry about. This is basically a wet bar. And 99% of the time we’ll be connected to city water.

The tank will fit snugly inside the galley cabinet, under the sink. Which means it’ll always be at “room temperature.” I plan to mount the ShurFlo pump directly to the top of this tank. The 3/16″ thick polystyrene plastic, and the water it contains, should help baffle any pump noise much better than if I were to mount the pump to the metal cabinet or a piece of plywood.

So basically, the galley will be entirely self-contained except for the filler hose and the sink drain. The filler hose will be 1/2″ braided nylon leading to my ShurFlo fresh water inlet which I’ll mount through the hull, somewhat near the gas cap.The sink’s drain can run to a standard-sized tank (like this 24x16x8″ 12-gallon Valterra model) strap-mounted under the driver’s seat, connected with flex hose. Or it could just drain temporarily into a garden hose adapter and onto the ground, since it’s just grey water.

There are also plenty of portable grey water tanks that works like carts. You just park it under your RV and run the drain hose into it. When it gets full you cart it off, dump it, spray it out and reconnect it. Rinse and repeat.

Yep, this is the least enjoyable part of the project. Until, that is, I tried out my new orbital buffer on a few aluminum panels. I used Brasso metal polish and a variety of bonnets ranging from wool to terry cloth to microfiber.

The first panel turned out pretty good, but I noticed my pads were turning black for some reason. The only source of black, as far as I could tell, was the rubber backing pad on the polisher — which was always covered up by the bonnet. And it was not showing any signs of wear. But then I noticed the wall panels themselves were turning a grayish-black too, and it wasn’t just smears!

So then I googled the problem and learned that when you polish any protective coating off aluminum, it reforms aluminum oxide almost immediately and those microscopic aluminum flakes are black! So now I have to figure out how to avoid this, and I’m at a loss. Maybe it means I need a different polish that has a bit of acid? I don’t know. What I do know is that at this pace I’m going to need a truckload of expensive bonnets. I might try washing them tomorrow to see if I can get a few uses out of them. Ugh…


Plumb & Plumber

Today I went to Home Depot and took two trips to a local plumbing shop, trying to find some combination of fittings that would work for the galley faucet. This is the problem with brick-and-mortar stores. Your choices are limited to whatever they have in stock.

Here’s what I’ve got so far. These are the drop elbows I was talking about, mounted on a piece of marine plywood whose depth is TBD. The faucet’s water supply connections are 3/4″ female. But it turns out these drop elbows are 1″ female. So I had to add a face bushing to the 3/4″ nipple to make up the difference. And that, of course, is less than ideal. That’s one more point of potential failure.

Later I found these 3/4″ SharkBite drop elbows on Home Depot’s website. So that would eliminate the need for the face bushings. It’s not in stock, so I’ll have to wait for it. I can’t secure the plywood until I dry-fit everything together, but I should be able to figure out the drain and pump by the weekend.

Electrical? Check!

Today I really enjoyed using the new steps. They make getting in and out of the RETROvan so much easier, centered between two pairs of hops barrels.

This morning I replaced the refrigerator’s Leviton plug with a dual GFCI outlet. Not only can I plug another 24/7 load into it (in this case the dehumidifier), but this type of outlet is inherently safer. It will not operate unless it detects that the circuit is properly grounded. Which in this case, it is. All the ground wires eventually lead back to a screw on the steel frame inside cavity P1.

Next up, I popped off ceiling panel T7 in the back, drilled some holes and installed rubber grommets. Then connected up the RETROcam’s 12V-to-5V converter and Ethernet cables through that ceiling cavity. No easy task, single-handed. I forgot to take a photo of this but it looks (and works) great.

And finally, I spent most of the afternoon cutting 6-inch blocks of 2-inch thick insulation for the corner cavities. While this looked nice and neat at first, I soon realized that I was cramming all the wiring up against the hull, which gets blazing hot in the summer.

So I changed it so that all of the cables are on the inside, protected from the elements and a bit more accessible if I ever need to make repairs. The photo above is over the helm wall panel, which is like Grand Central Station. Not only is that were the main 120V and 12V trunks are, it’s also where my new AppRadio auxiliary audio cable hole and the HDTV powered antenna jack goes. And that antenna can now drive two TVs at once.

After reinstalling all the corner panels, here’s how she looks. Now I think the electrical is all done. I just need to do some simple cable management on everything I can’t easily hide behind the TV mount. That’ll mostly mean using some fancy twist ties made for AV equipment.

Here’s the driver’s side, all buttoned up again. You can see the insulation panels leaned up against panel D2, which is where the galley sink goes. That’s my next major task, once I find the right fittings to make it all work. But at least now I can get all the leftover insulation out of our garage. I’m guessing I used about 200 square feet in total.

To the right of the medicine cabinet, out of view, is the galley power strip. I cut the holes and installed it today as well. That strip will service the dual ovens in the galley cabinets. It’s on its own dedicated circuit because ovens are power monsters.

But yeah, did I mention the electrical is finally ALL DONE?! Time to chillax with a cold brew and enjoy Olivia’s world famous lasagna. We’ll probably watch the Cowboys/Falcons game out on the RETROpad tomorrow if it’s not too rainy. Hot tubbin’ time too!

Stepping Up

Today I finalized a design for a set of steps for the RETROpad. The problem was, once I jacked up the front end to make it level, that top step became dangerous.

The construction is sturdy, easy and cheap ($70 total), but the math was tricky. Each 12-inch step will rise 7 inches at a 30° incline. The 2×12 steps will be two feet wide, secured with 2×4 galvanized steel Simpsons Strong-Tie brackets. The third step will rest atop the concrete curb on short 4×4-inch posts to create a cantilever. And that means the steps will never contact the RETROvan’s hull.

I also placed my Blue Sea Systems order for the custom helm labels.

Today I’m planning another Home Depot run, followed by more electrical and plumbing work. I need to run cables through ceiling panel T7 and replace the refrigerator socket with another GFCI wall outlet. I also have to figure out how to best hide some cables feeding the TV and its mount.

Well I didn’t get most of that done today, but I did build the steps in the rain:

I just about broke both shins when I walked up to the top step and it seesawed on me. I had thought I could put the support under the third step and it would be heavy enough to not act as a fulcrum. But no—physics always wins. So I went to Plan B and put two 4×4 posts under the top step. I don’t really like the look but maybe I’ll improve it later.

I’ve finally learned that math can only get you so close when you’re working with nominal lumber. I found variances of up to 3/16″ in these boards which kept throwing me off. So I wound up doing most of it by eye and averaging out the errors. I’m pretty happy with the way it turned out, and it’ll make the RETROvan that much more accessible.

“Always thinking one step ahead… Like a carpenter… Who makes stairs…”

Plumbing Sucks

Today I put the RETROcam on its own dedicated circuit by replacing its 120V power adapter with a custom inline step-down converter from 12V to 5V. It fired right up without burning a wall outlet. Tomorrow I might run its cables through ceiling panel T7, but that means I’d have to fabricate two more RETROpod speakers at the same time.

Then I hooked up the vintage JVC “TinyVision” TV that I rescued from the 1970s on eBay — also known as the VC 3020GM Videosphere Cube TV. I made sure it all worked on the aft 120V outlet. And so it did.That TV could be wall-mounted in the corner, over the bed. And with the help of this cheap little iView digital converter box, it can tap into the same HD antenna as my main Sony Bravia HDTV. Only it displays authentic B&W NTSC signals in all its 4:3 cathode ray glory. That’s always great for all our 8mm home movies that I transferred to digital. Also great for falling asleep to classic shows like the The Twilight Zone and The Outer Limits. Shows you can barely follow because of the low-fidelity and buzziness.

Now that I have wall plugs, I tested my circuit breakers by running my space heater and my heat gun at the same time. And right on cue, that 15A circuit breaker popped without affecting any other circuit. Just the way it’s supposed to work.

Next, I started working on the galley plumbing. I built a backing “box” out of marine plywood that’s about 24×13″. Then I positioned it behind the D3 panel, atop the horizontal rib, and traced my pre-cut faucet holes. Next, I screwed the two brass drop elbows into place on the plywood and dry-fitted everything back together.

All the spacing was perfect, but I soon discovered a really perturbing mismatch on the thread coarseness. I may need to get a couple of brass “close nipples” to allow the faucet to mate properly to the water supply assembly I built.

Next, I struggled to cut and attach my 1/2″ braided nylon hose to the barbed brass fitting and discovered they weren’t really made for each other. But once I heated the tube up next to my space heater, then I was able to force it onto the barbs. I was not, however, able to slip the stainless steel clamp rings over the barbed tube. Those clamp rings are made for PEX tubing, which must be thinner. So I might have to switch gears and use PEX instead. But that stuff is much stiffer, so it requires things like elbows to make turns, unlike the braided nylon tubing.

The Peerless faucet is actually dry-fitted into place tonight and it looks great. I’ll post actual photos once I figure these details out.

The aluminum panels are starting to look a bit oxidized, so it’s time to get some metal cleaner/polish like Brasso.

Tomorrow I have an interview with Apple up in Vancouver, so I probably won’t get anything else done.


Electrifying!

I had to turn the TV off because I’m sick and tired of CNN and other networks giving religious idiots an open mic every time there’s a national tragedy. “Thoughts and prayers” are an absolutely insulting answer to gun violence.

Then I found that if I start a draft blog post in the morning stating what I did today in the past tense, I tend to get most of that stuff done.

On Monday I elevated the RETROvan’s front end to make it more level. These levelers are pretty ingenious. You basically lay the long pieces down and drive onto them, rolling them back and up. Then you wedge the chock underneath to secure up to a 4-inch rise.

This did the trick, within a quarter-bubble. But now the entry step is a bit more daunting. So I’m going to have to build a custom jetway at some point. For that I might find some adjustable metal steps or a ramp. Or I’ll most likely build something from timbers.

I took a trip to George Morlan Plumbing in Tigard, and they had the brass drop-elbows and tee I need to plumb the galley. Then I headed to Home Depot for a variety of outlets, cables and junction boxes. I overbought knowing that I can take stuff back.

Once my 1-inch rubber grommets arrived late Monday, I finished running cables through the corner cavities. I made sure any 120V junctions are up to Code by stuffing them into conduit bodies like this.

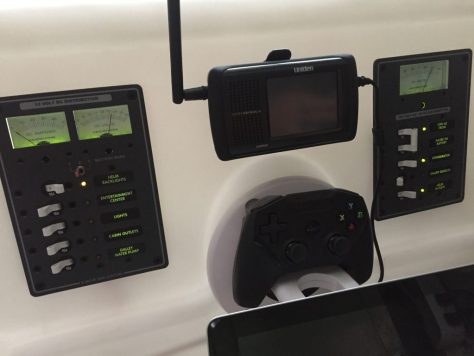
I also made some tough decisions about adding and/or combining circuits. And that means I’ll have to order a new set of custom AC/DC panel labels.

That order is shaping up like this. I finally decided to go with COMMLINK over the Navy terms COMM SYS or COMM STA because COMMLINK is a broader sci-fi trope.

In keeping with my RETRO theme, I’m calling my custom speaker cans RETROpods. Formerly known as Photon Torpedo Tubes One through Four.

On Tuesday I pulled two windows and cut those wall panels for outlets. The process for the 2-gang aft plate went like this:

First, figure out how the outlet box works. This ingenious Carlon box has a high-voltage (enclosed) side and a low-voltage (open) side. Basically I positioned it and traced its outline with pencil. I also sketched the configuration I wanted because it’s too easy to forget and mess up. Then I drilled four 3/8” holes for my blade entry, and four 5/16” holes to accommodate the cover screws just in case.

Here again I’m using Frog Tape to protect the finished aluminum from gritty scratches. Once the hole was cut with square corners, I made sure the box fit snugly. It dropped right in.

Fortunately these boxes have two little wings in the back that fold out and screw tight, holding the box up against the wall no matter how thick it is. It doesn’t care whether it’s 5/8″ drywall or 1/16″ aluminum.

The next step was dry-fitting everything to see how much insulation to cut. Jigsaw time again. These outlet boxes are three inches deep, just like my wall cavities. Lucky, eh?

Here I’ve pulled the cables through the box with just enough slack. Note how I’m protecting the connectors with Frog Tape and the braided conductors until I’m ready. Electrical cables should always enter from the bottom so that any water drips off the loop below the outlet box. This work is all up to Code.

Here the 120V outlet is done and the low voltage side is prepped. That Cat6 jack isn’t your ordinary Ethernet jack. It’s shielded. This side was harder because coaxial cable gets stiff in the cold.

And here we are all buttoned up. And yep, that outlet also has two 3.6A USB ports. There’s only one problem: The modular insert on the right is thicker than the outlet on the left, and the cover plate doesn’t lie flat against the wall on that side. So I’ll have to find a rubber gasket to compensate, or maybe some washers. Poop.

With panel P6 done, I repeated the process for the GFCI outlet on panel D3. This one will power the 1000W coffee maker on the galley countertop. It went in easy, thanks to prior experience. The photo doesn’t look like they line up, but they do.

I may replace the refrigerator plug with another GFCI outlet and matching plate, but now it’s dark and I’m done for the day. Thanks to my friend Bob Prokop for lending a hand again with the windows and galley cabinet.

Just Another Saturday

This morning was cold and rainy, but it looks like the dehumidifier is doing its job:

Notice the indoor humidity is only half of the outdoor humidity.

Today I connected my spare 120V cable to supply the two outlets on the driver side in panels D3 and D6. To make the branch in the 12AWG triplex cable I used standard wire nuts instead of quick-connects, and it looks safe to me. I haven’t yet cut the outlet holes in the aluminum because that means I have to remove windows and I want to have everything I need in hand before getting caught windowless in the rain.

Here’s an action shot from the RETROcam. In the background you can see I’ve got Batman on. That’s shuffle-playing on Apple TV from one of my iTunes playlists called “TV 1960s.” So all day I’ll get shows like Hogan’s Heroes, Star Trek, Looney Tunes, Get Smart, The Andy Griffith Show, Gilligan’s Island, Bewitched, I Dream of Jeannie, and more — all commercial-free.

Next I drilled the wiring hole behind the RETROcam and then realized it runs on a 120V to 5V adapter. So that means I could instead repeat what I did for the weather station and make my own power supply cable that runs off 12V and converts down to 5V. That way I can hardwire the camera and save an outlet and an ugly pass-through hole on the wall. It’s also a bit more secure that way.

So I ordered a second one of these little gadgets. I’m tempted to tap into the ventilation circuit in the adjacent ceiling panel but that’s a hassle. So I’ll probably just run a dedicated 12V cable since I already have an open path on the passenger side. That’ll allow me to put it on any circuit I want in the helm’s DC panel.

I also need to run a 12V cable for the galley water pump while I’m at it. I can’t believe I forgot to do that before buttoning up ceiling panel T2. That’s the cavity with the TV mount, over the helm. I suppose I could just tap it off the two galley outlets (USB and 12V) since those will be low-load and the water pump will only run intermittently. That’ll be much easier — yeah.

I had to remove all the cushions again because of all the aluminum shrapnel from drilling. But here’s a shot of the cabinetry paint finish on the driver’s side. In the background you can see the galley’s base cabinet too. I still need to remove all the marine plywood from the floor and give it a coat of polyurethane. I’m really not looking forward to removing all the pedestals again. Someday I’ll learn to do things in the proper order. But I absolutely hate painting things. 🙂

Now I’m taking a coffee break, just waiting for parts to arrive this afternoon.

Data Driven

Having spent most of yesterday procrastinating, designing and shopping, today I sprang back into action and disassembled panel P1 along with several top corner panels. No easy task!

I also marked five aluminum corner panels and dropped them off at Archers Precision. In less than two hours, Casey had sheared them all to size. So now when I reinstall them, the overlapping lower edges will line up nicely along both sides. One of those panels was mis-cut by Metal Supermarkets. The rest just needed trimming because of they way they overlap. The metal thickness is 1/16″, so a few needed to be trimmed by a multiple of 1/16″ to allow for “stacking.”

Meanwhile, I installed the Ethernet inlet jack and its waterproof gland. Here are the cable-side parts before assembly.

And here’s the result. I love that the rubber grommet is even red. The cable is a little difficult to remove from the jack, however.

Inside, I had to modify some insulation and then drill several new holes in various metal ribs and panels. I have to wait for my 1-inch rubber grommets and the two 20-foot Cat6 cables to arrive before I can finish this task.

But basically, this Ethernet inlet is now connected to my Apple AirPort Extreme, which acts like a hub with three jacks.

The first cable feeds my Apple TV. This means I can run ScenarioTV from my media server in HD, and without the glitches inherent over Wi-Fi.The second cable will feed the RETROcam, which I mounted upside-down in the rear ceiling panel (T6), facing forward. This camera is now operational as a part of our home security system. It acts as a sentry to detect any intruders who may happen to beam aboard without authorization.

The third cable will feed an Ethernet jack installed in a rear wall panel on the driver’s side (D6). I’ll be able to plug my 5K iMac or a MacBook Pro into that for working at the table. That jack will be in a two-gang wall plate along with a 120V outlet. The data side may have a second Ethernet jack, but most likely a cable jack for future expansion.

And finally, I discovered and ordered a 16-inch plastic model kit for the Proteus submarine from the 1966 sci-fi classic Fantastic Voyage. You may remember from my earliest posts that the RETROvan’s design is inspired in part by that movie. So this will be another fun display piece.

Tailgating & Plumbing

It’s been a few days since my last update because we decided to reassemble the RETROvan just enough to enjoy the last few days of sunshine here in the Portland area.

Olivia and I had fun watching the World Series and we even moved our hot tub from the back acre to the RETROpad, directly outside the door and through the hops garden:

The charcoal finish on the woodwork looks amazing! I just need to install the white doors and Velcro the cushions in place now. Photos coming soon.

Here’s a better shot of the inside of the helm now. AC on the left, DC on the right. Inverter and batteries below. Some day I’ll add a bus bar or fuse block in the upper center area.

I’m testing an INSTEON security camera, and yesterday I installed a chrome grab bar to the helm to help our friend Diane get in and out.

I just got my waterproof Ethernet connectors, so I drilled a 7/8″ hole in the hull, next to the shore power inlet. So at least now we can open and close the door without a cable blocking the way. I’ll have to remove panels tomorrow to install all the Ethernet cables to and from the AirPort Extreme, which acts as a network hub. The part above goes in the wall. The part below goes on the cable:

Today my other goal is to figure out the galley plumbing. These are the components I’m dealing with:This is the Kingston Brass sink that fits in the galley countertop. I’ll need to buy a drain assembly for it. That drain will go out the back of the galley cabinet, which you may remember is a modified HUSKY stainless steel tool chest from Home Depot. From there the drain will flow to a gray water tank.

This is my Delta Peerless wall-mount faucet. It has hot and cold handles, but they’ll both serve up cold water because I don’t really need a water heater. Hot water can be made in the microwave oven in a pinch. I’ve already cut the two water supply holes in panel D2, but the trick will be how to support the substantial weight of the faucet from behind that panel.

And this is the SHURflo 12V pump that will push water up six feet from the fresh water tank to the faucet on demand.

I will also have to buy two water tanks and mount them under the chassis. Not looking forward to that. I have 1/2″ braided nylon hoses to connect everything, but I’ll have to figure out all the fittings. And I might wind up using PEX tubing instead.

For supporting the faucet from behind the wall cavity, I’m thinking about using something like this:

This is called a drop elbow, with mounting ears. I would screw two of them into a piece of marine plywood at the right distance apart (about 9 inches for my faucet holes). Then the plywood can rest atop the horizontal wall rib and mount between the two vertical wall ribs with angle brackets. From there, it’s just a matter of attaching the 1/2 inch supply hoses to the barbed fittings. They can run down to a tee fitting that connects to the pump’s outlet.

I haven’t yet decided where the pump will mount. The easiest access would be in the bottom of the galley’s sink cabinet. But then it would be loud and it would take up valuable storage space. If I put in inside the galley’s base cabinet, it’ll barely fit and if something goes wrong I’d have to take everything apart. If I put it under the chassis, then I have to build a box to protect it from the elements. So that’s probably out. So it looks like the bottom galley cabinet wins.

That’s the plan so far. It’s still evolving, so stay tuned…

Meanwhile, I put the Batmobile and a Bat Signal up on the temporary shelf, over the driver’s seat. How cool is that?