Transparency is Good

Not just in politics, but in life too.

Got my custom acrylic back today from TAP Plastics in Tigard. The holes were a little off but I needed to drill them out bigger anyway to fit my #10 machine screws through both pieces. This was a delicate process but by stepping up through three bit sizes, I got there with no damage.

The result is beautiful at every angle, especially in the sunlight. This will hang either over the steering wheel or over the center of the cockpit, under the custom shelf and storage cabinets I’m building over the windshield. The position depends on whether it blocks any sight lines. And if it blocks too much, I can always flip it over and mount it lower on a dashboard mount.

All I need to do now is select, mark and drill the holes in the sides that will secure the Pioneer AppRadio 4 receiver in place. I’m using #10 thumbscrews to secure the gimbal mount to the 2-1/2 inch screws. But for final installation I might swap those out for capture bolts on 2-inch screws. All the hardware is stainless steel, of course. You wouldn’t want any chance of corrosion marring the acrylic.

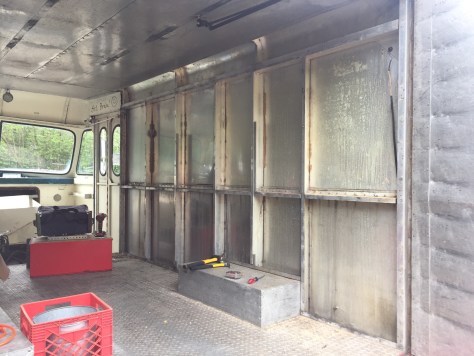
Now the two most important parts of the project are pretty much done: The main audio/video receiver with Apple CarPlay, and my four custom Sony speakers in Photon Torpedo Tubes. If only I had a clean van to install them in…

The Front Desk

Well that didn’t take long. TAP Plastics took all of 20 minutes to cut six pieces and router all the edges smooth. The cost was $137. There are two extra pieces I might use as bracket spacers, not shown here:

This plastic is very easy to work with. There’s no sawdust when you drill it and it’s all the same density. I’m putting a lot of trust in 20 stainless steel machine screws but they went in tight and they’re all vertical so there are no shear forces. The 1/2 inch material isn’t really thick enough to countersink the screw heads but that choice was to keep things light and flexible. They do make 5/8″, 3/4″ and 1″ Starboard if I ever need to redo it. But I’ll probably just set a rubber mat or tray organizer on the top. Maybe a cat bed. 😉

It fits like a glove on the support brackets and it isn’t too heavy to lift. Of course it’ll all look better once the cockpit is cleaned and restored. But it’s a good start.

Fabrication Begins

Lots going on this week. First, I fabricated my first custom part, which I’m dubbing Photon Torpedo Tube #1.

The wake board “bullet can” housing is made by Rockville out of polished aluminum. The speaker is a Sony 6.5″ Marine 2-Way. The problem is, they didn’t fit. It turns out all 6.5″ speakers are not created equal. Some are considered undersized, like the stylish ones I insist on using.

So, I wound up having that red adapter ring made at TAP Plastics in Tigard. What a godsend they are. They’ll be doing more work for me. 

The ring is 1/4″ thick acrylic, with an outer diameter of 7″ and an inner cutout at a 5″ diameter. The outer edges are polished smooth.

The trick here was to carefully mark and drill two sets of four holes. The first set has to be countersunk so that the machine screw heads don’t protrude into the speaker mount. Once the ring was attached to the can, I repeated the process for the speaker using the screws that came with it.

The hardest part was working delicately with hand tools, with drill bits that tend to wander. I do have a Dremel tool but wound up just using my drill/driver because I did had to punch through the aluminum lip at just the right diameter and depth, with some force. This would have been much easier with a drill press.

The result is fantastic. I basically turned $135 worth of parts into custom piece of retro art. Now I’ll just repeat this process three more times to cover every corner of the Scenario Mobile.

The speaker cans came with fancy round bracket clamps, which I plan to secure on 2″ stainless steel rods.

Next up, I received my “glove box” today. It’s actually a gun safe with a biometric fingerprint reader, made by Verifi.

It seems to work great and after a bunch of research, it was the best fit for the space next to my engine cowl.

I’ll be returning to TAP Plastics tomorrow to cut four pieces of marine King Starboard. This is the same stuff boats and yachts are outfitted with, so you know it’s durable. You can use common woodworking tools on it, but it doesn’t warp or splinter like wood.

Here’s my design for the combination “front desk” and secure storage:

I’ll screw the enclosure together and then bolt the safe into place so it can’t be stolen. The whole assembly will be heavy, but I should be able to unsecure it and lift it off the support brackets to open the engine cowl.

Peeling the Onion

Today I started removing rivets with a sledgehammer and chisel. Hundreds of rivets… Thousands of rivets… Roughly twenty minutes per panel so far.

Some of the aluminum panels are almost twelve feet long. I’m not sure whether there’s enough scrap value to avoid going to the local recycling center. And while the wear and tear is certainly interesting, there are too many non-rivet holes so reuse them as finished cladding even if they were buffed out. But I’ll number them and keep them around for a while.

The wall cavities measure 3-1/8 inches deep, which is plenty of room for better insulation. But it also means the windows will have to be recessed because they max out at a 2-3/4 inch depth.

The main task here is to expose the frame ribs, remove the old insulation and transfer some accurate measurements into my SketchUp 3D model. From there I’ll be able to better plan out all the fixtures, including:

  • electrical system
  • window placement (and wall thickness)
  • vent placement
  • air conditioner placement
  • solar panel placement (at least the pre-wiring)
  • insulation
  • interior lighting

Starting to look like a tiny home, eh?