Here’s the first tube. The glass is a perfect fit! I only had green fishing line on hand but this is proof that a more detailed internal structure will glow and breathe. Shown here powered at 4V. The size is 7mm diameter and 32mm long.
Here is it powered at 12V. I will install eight of these inside Ronaldo’s two HIWATT amplifier heads.
Here are the unpowered placeholder bulbs Ronaldo is using.
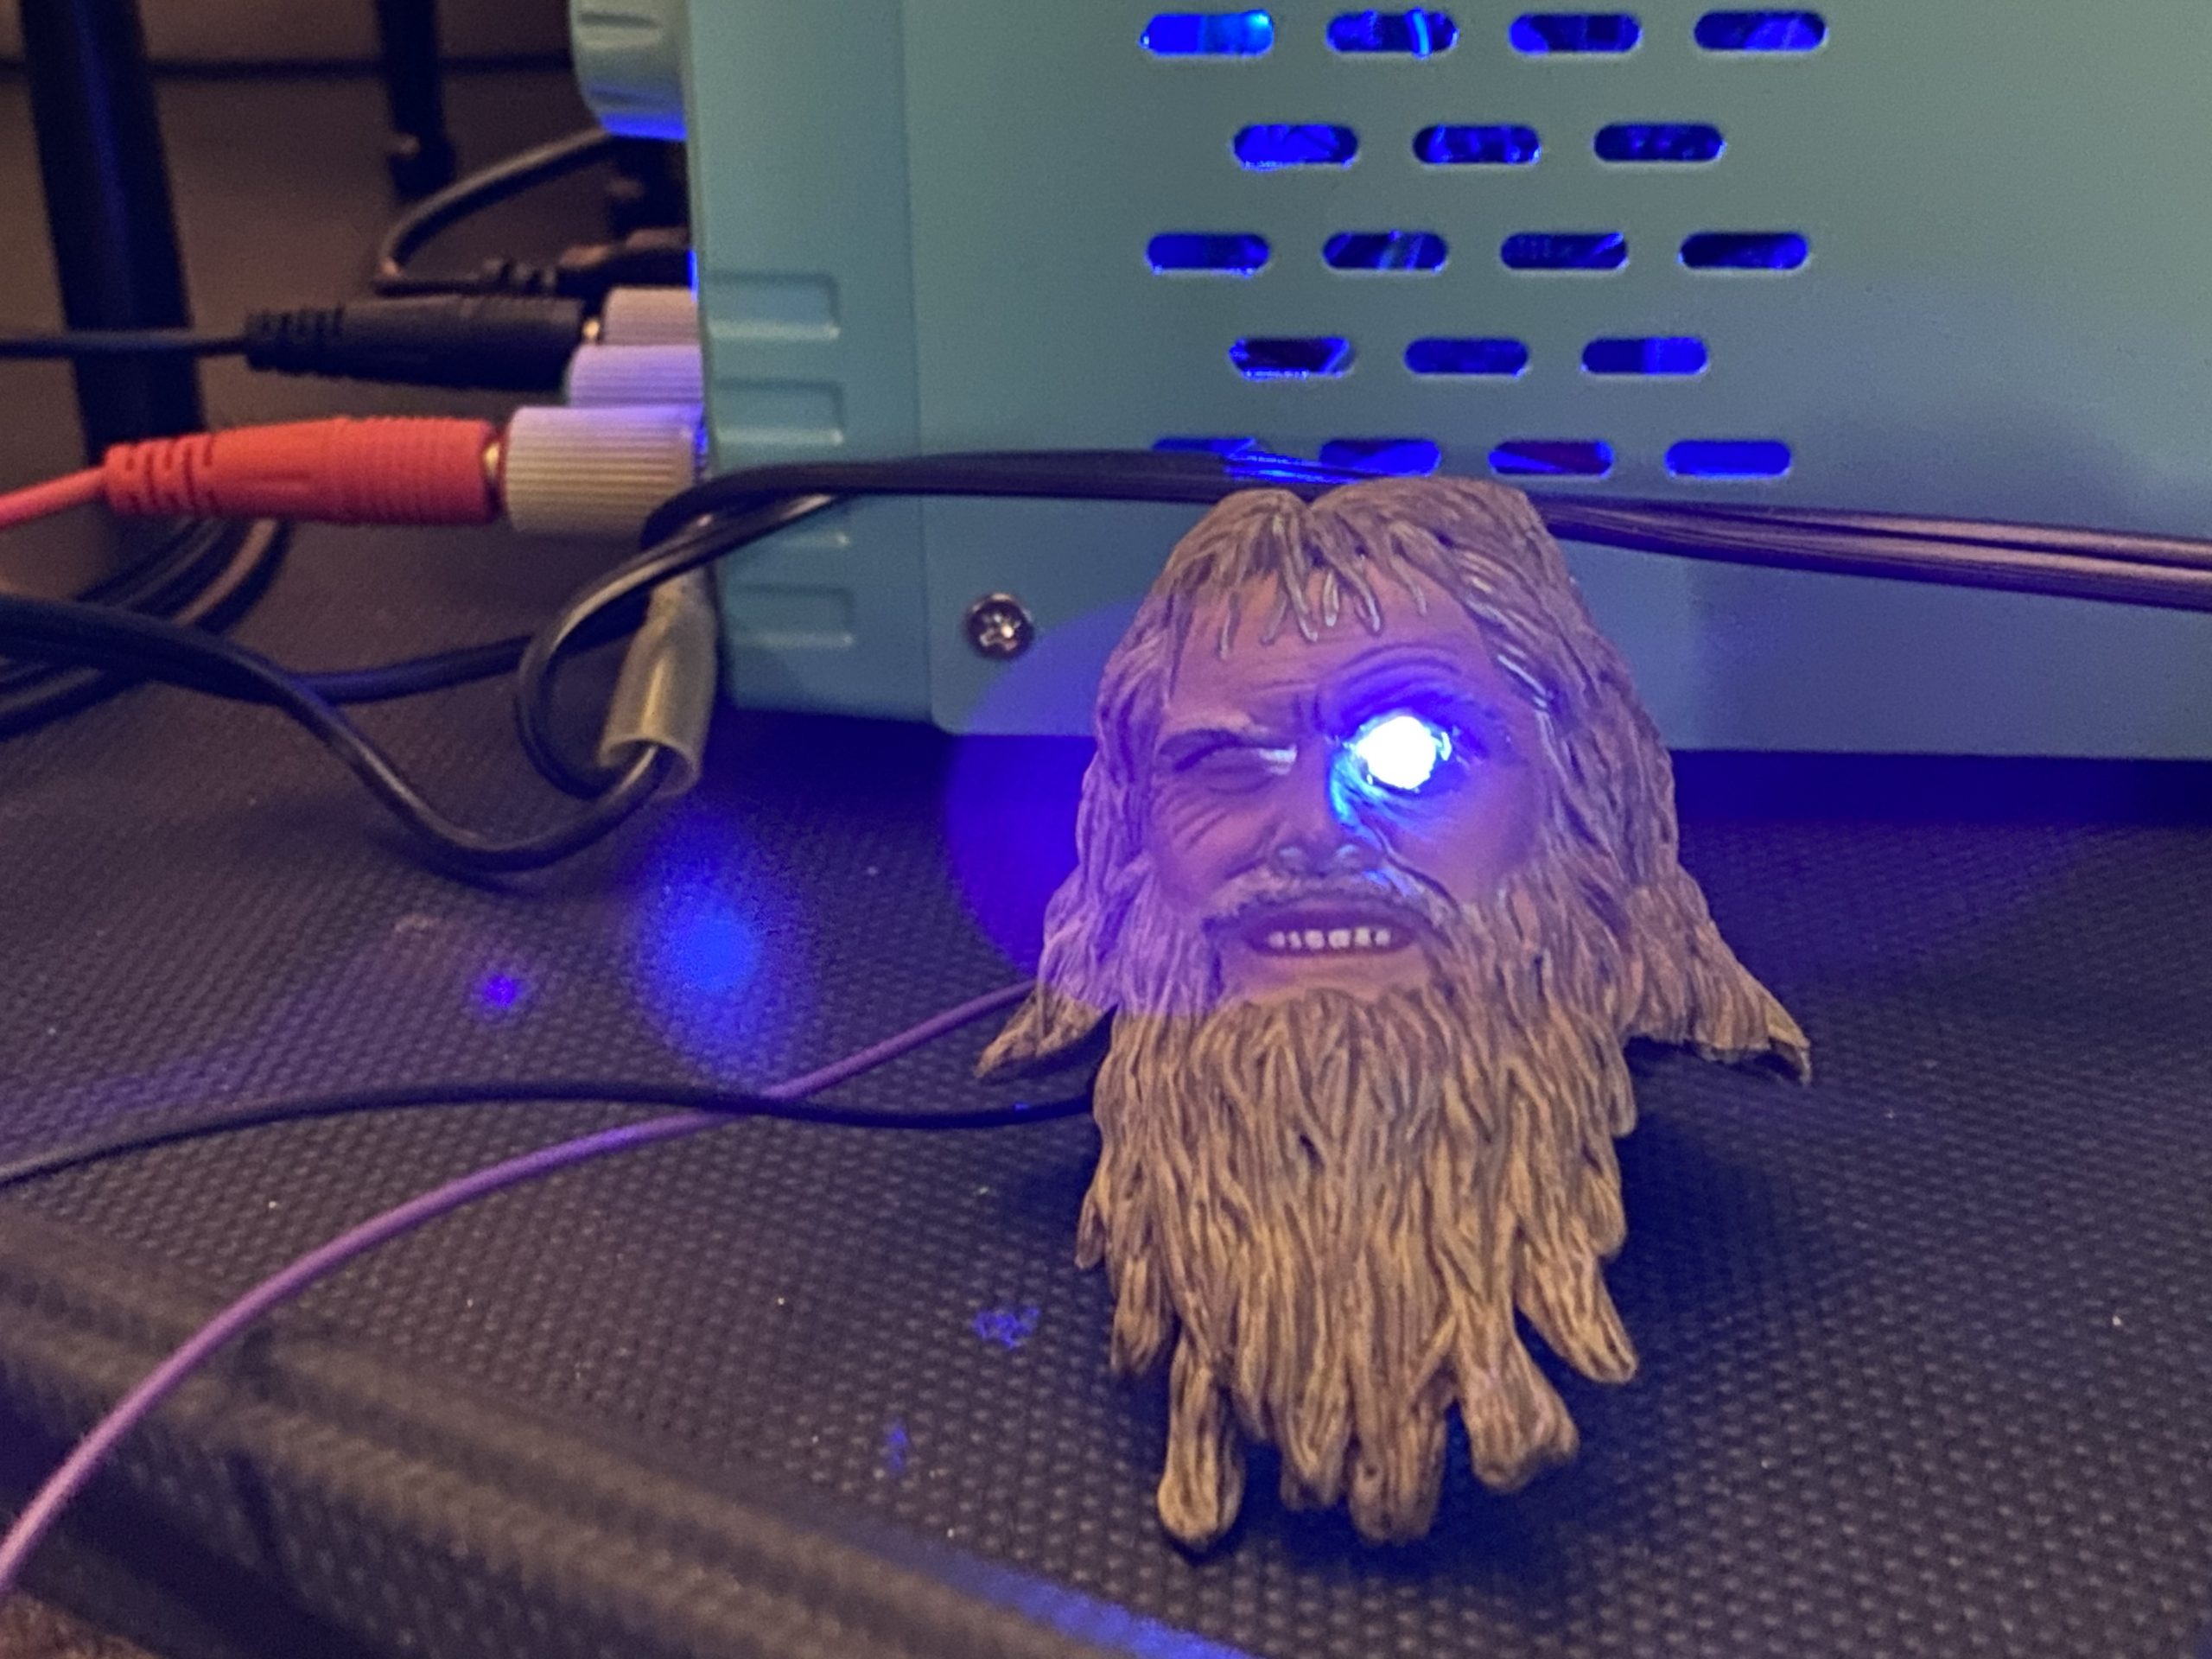
Today I decided to mod two of my characters. Here I’m replacing The Bridgekeeper’s good eye with a UV bulb.
The trick is to drill a small pilot hole through the eye, angled just right to miss the brain stem. Then from the back, I drilled progressively larger holes until the 5mm bulb would fit, right up to where his eyeball would be, but not breaking the skin.
And here’s the test at 12V. It’ll look better in the dark, dialed down to 4V. And I hope it casts the same ultraviolet lens flares.
These lights (including nine vacuum tubes) will be controlled via this 24-channel constant voltage DMX decoder. This is a different type of decoder than I used on the drum kit. This one is meant for “dumb” lights. Lights that can dim only in response to their power level. That way they too can throb and breathe with the music or with the dialogue.
Then it was time to lock down Zoot & Dingo. Their costumes got some padding to make them look (barefoot and) pregnant. This is because the pregnant “Phicen” bodies I ordered from China turned out to be counterfeit JAIOU DOLL bodies, so I sent them back and opened a case on eBay.
And it’s time to take the backings off their pyramid headstones while also making sure the earrings stay in place, in turn keeping their pill hats on their heads while I animate them.
So here’s how they look now. Next, I disassembled those copper microphones and mounted a 5mm UV LED bulb inside the mics. The idea here is that instead of 1:1 audio cables, these 1:6 instruments will have lighting cables. You can see the glow on Dingo’s face. My DMX program will synchronize that lighting intensity with whatever they’re singing.
The mics can be handheld too, which gives me opportunities to aim the lights differently.
And lastly, Tim the Enchanter gets a UV light too, in the tip of the wooden staff that he famously uses to cast fireballs, for sport. This was pretty tricky too. Lots of progressively larger drill bits, trying to keep them straight and true. Since my bits were only three inches long, the wires emerge from the staff near Tim’s hand — which is okay. For this prop and back of The Bridgekeeper’s head, I painted the visible wires various shades of brown to blend in.
Notice the stage monitors at Tim and King Arthur’s feet? My son Steven 3D printed those for me. Doesn’t that texture look great? Today’s his birthday!
Ronaldo is starting with the Fender Rhodes Stage 73/88 Mark I Electric Piano and the EMS Synthi Hi-Fli Guitar Synthesizer. Looking good so far!
Meanwhile, today I received two sets of LED lights from Amazon and eBay:
First up is the N-scale LED, intended for model train roadways and parking lots. But here, with a 1/64″ hole, a drop of super glue, and a 3V AA battery pack — they make fine 1:6 scale piano lights. (This is just one of my cheap miniature keyboards.)
Next is the 5mm UV LED, lit up here by my 12V power supply. These dim nicely too, simply by lowering the voltage. I should receive the tiny glass test tubes next week to prototype some glowing vacuum tubes for our amps and the Hammond organ.
One of the best features of 70s music is the warm tones produced by analog instruments and amplifiers. That warmth was made possible by the use of vacuum tubes.
When electrons flow through a vacuum, carrying “musically” charged samples from an instrument or a microphone, the amplified signal distorts in a way that is more pleasant to the human ear than via digital circuits. That is, the frequencies are handled more naturally in an analog circuit versus in a digital circuit where those frequency values are quantized at a certain interval, clipped (rounded) to the nearest numeric value, amplified, and then converted back into an analog signal that can actually move a speaker membrane. As much as digital technology has advanced since the 70s and 80s, a trained human ear can still tell the difference, and that difference boils down to two flavors of distortion: Warm & Cool
The back of a HIWATT CUSTOM 100 amplifier head.
A big challenge in reproducing such equipment in 1:6 scale is how to replicate those vacuum tubes visually. Not just to sit there, but to light up, glow and even breathe with the music.
I found these little glass test tubes (or vials) on Etsy. The glass part is 7.8mm OD, 5.2mm ID, and 32mm long. I had to order them from China. Ten for less than $20. Shipping take long long time.
That’s less than $30 worth of parts. The idea is to mount the 5mm OD (outside diameter) LEDs wherever there’s a vacuum tube in the equipment. Now those LEDS are only 8.5mm tall, so that’s not tall enough for a typical vacuum tube. So, we’ll cut a piece of the clear rigid tubing to about 1 inch, and then fit it over the LED. That should work snugly because the ID (inside diameter) of this particular tubing is 5mm.
And the pièce de résistance is that we’ll cut some clear blue fluorescent monofilament (fishing line), fold it over a few times, and insert it into the clear tube. Then seal the top of the tube shut, or maybe plug it or cap it.
Now, when powered up, the UV light will illuminate the glow-in-the-dark fishing line and it should look just like a vacuum tube, also illuminating any neighboring photoreactive materials.
I just made a significant investment ($1690) in my current animation project. I commissioned Brazilian master craftsman Ronaldo Lopes Teixeira to build the following 1:6 scale keyboards and synthesizers used by Richard Wright on Pink Floyd’s classic album, The Dark Side of the Moon:
Hammond RT-3 Two-Manual Console with Leslie 122 Cabinet – $400Fender Rhodes Piano 73 Stage – $300Wurlitzer EP-200 Electric Piano – $300Mini Moog Model D – $150EMS VCS3 Putney – $150Synthi AKS Synthesizer – $150
Ronaldo will also for the first time build two new custom miniatures, used by David Gilmour:
EMS Synthi Hi-Fli – $100Custom HIWATT DR103 Head – $50 each
While these props will take up to six weeks to get here, I have to enlarge the set on my animation stage and figure out how to light them.
Fortunately I found a set of N-scale model train LED lights that I can modify as piano lights, using a standard 3V power supply or 2 AA batteries. I’m also looking for ways to make 1:6 scale vacuum tubes that glow and breathe a little.
Today’s project is a daunting one. This is the beautiful 1:6 scale desk hand built by Mihail, my carpenter friend in Ukraine. Check out his Furniture for Dolls side gig on Etsy for some amazing craftsmanship. I’m expecting there to be a wealth of 1:1 scale carpentry work there, once Putin is defeated. 🇺🇦
The idea here is to light up a bunch of props sitting atop the desk. So to make room for 12mm diameter LED Pixel Bulbs, I need to drill 1/2” holes in the desktop at strategic places, so as not to obstruct the drawers with the back ends of the bulbs, plus all the wiring.
Why use 12mm bulbs and not 5mm? Well, 12mm is the smallest LED bulb available today that has an IC built in. That chip enables it to be individually addressable as a pixel. The smaller bulbs can only be controlled in groups on a string or in a strip.
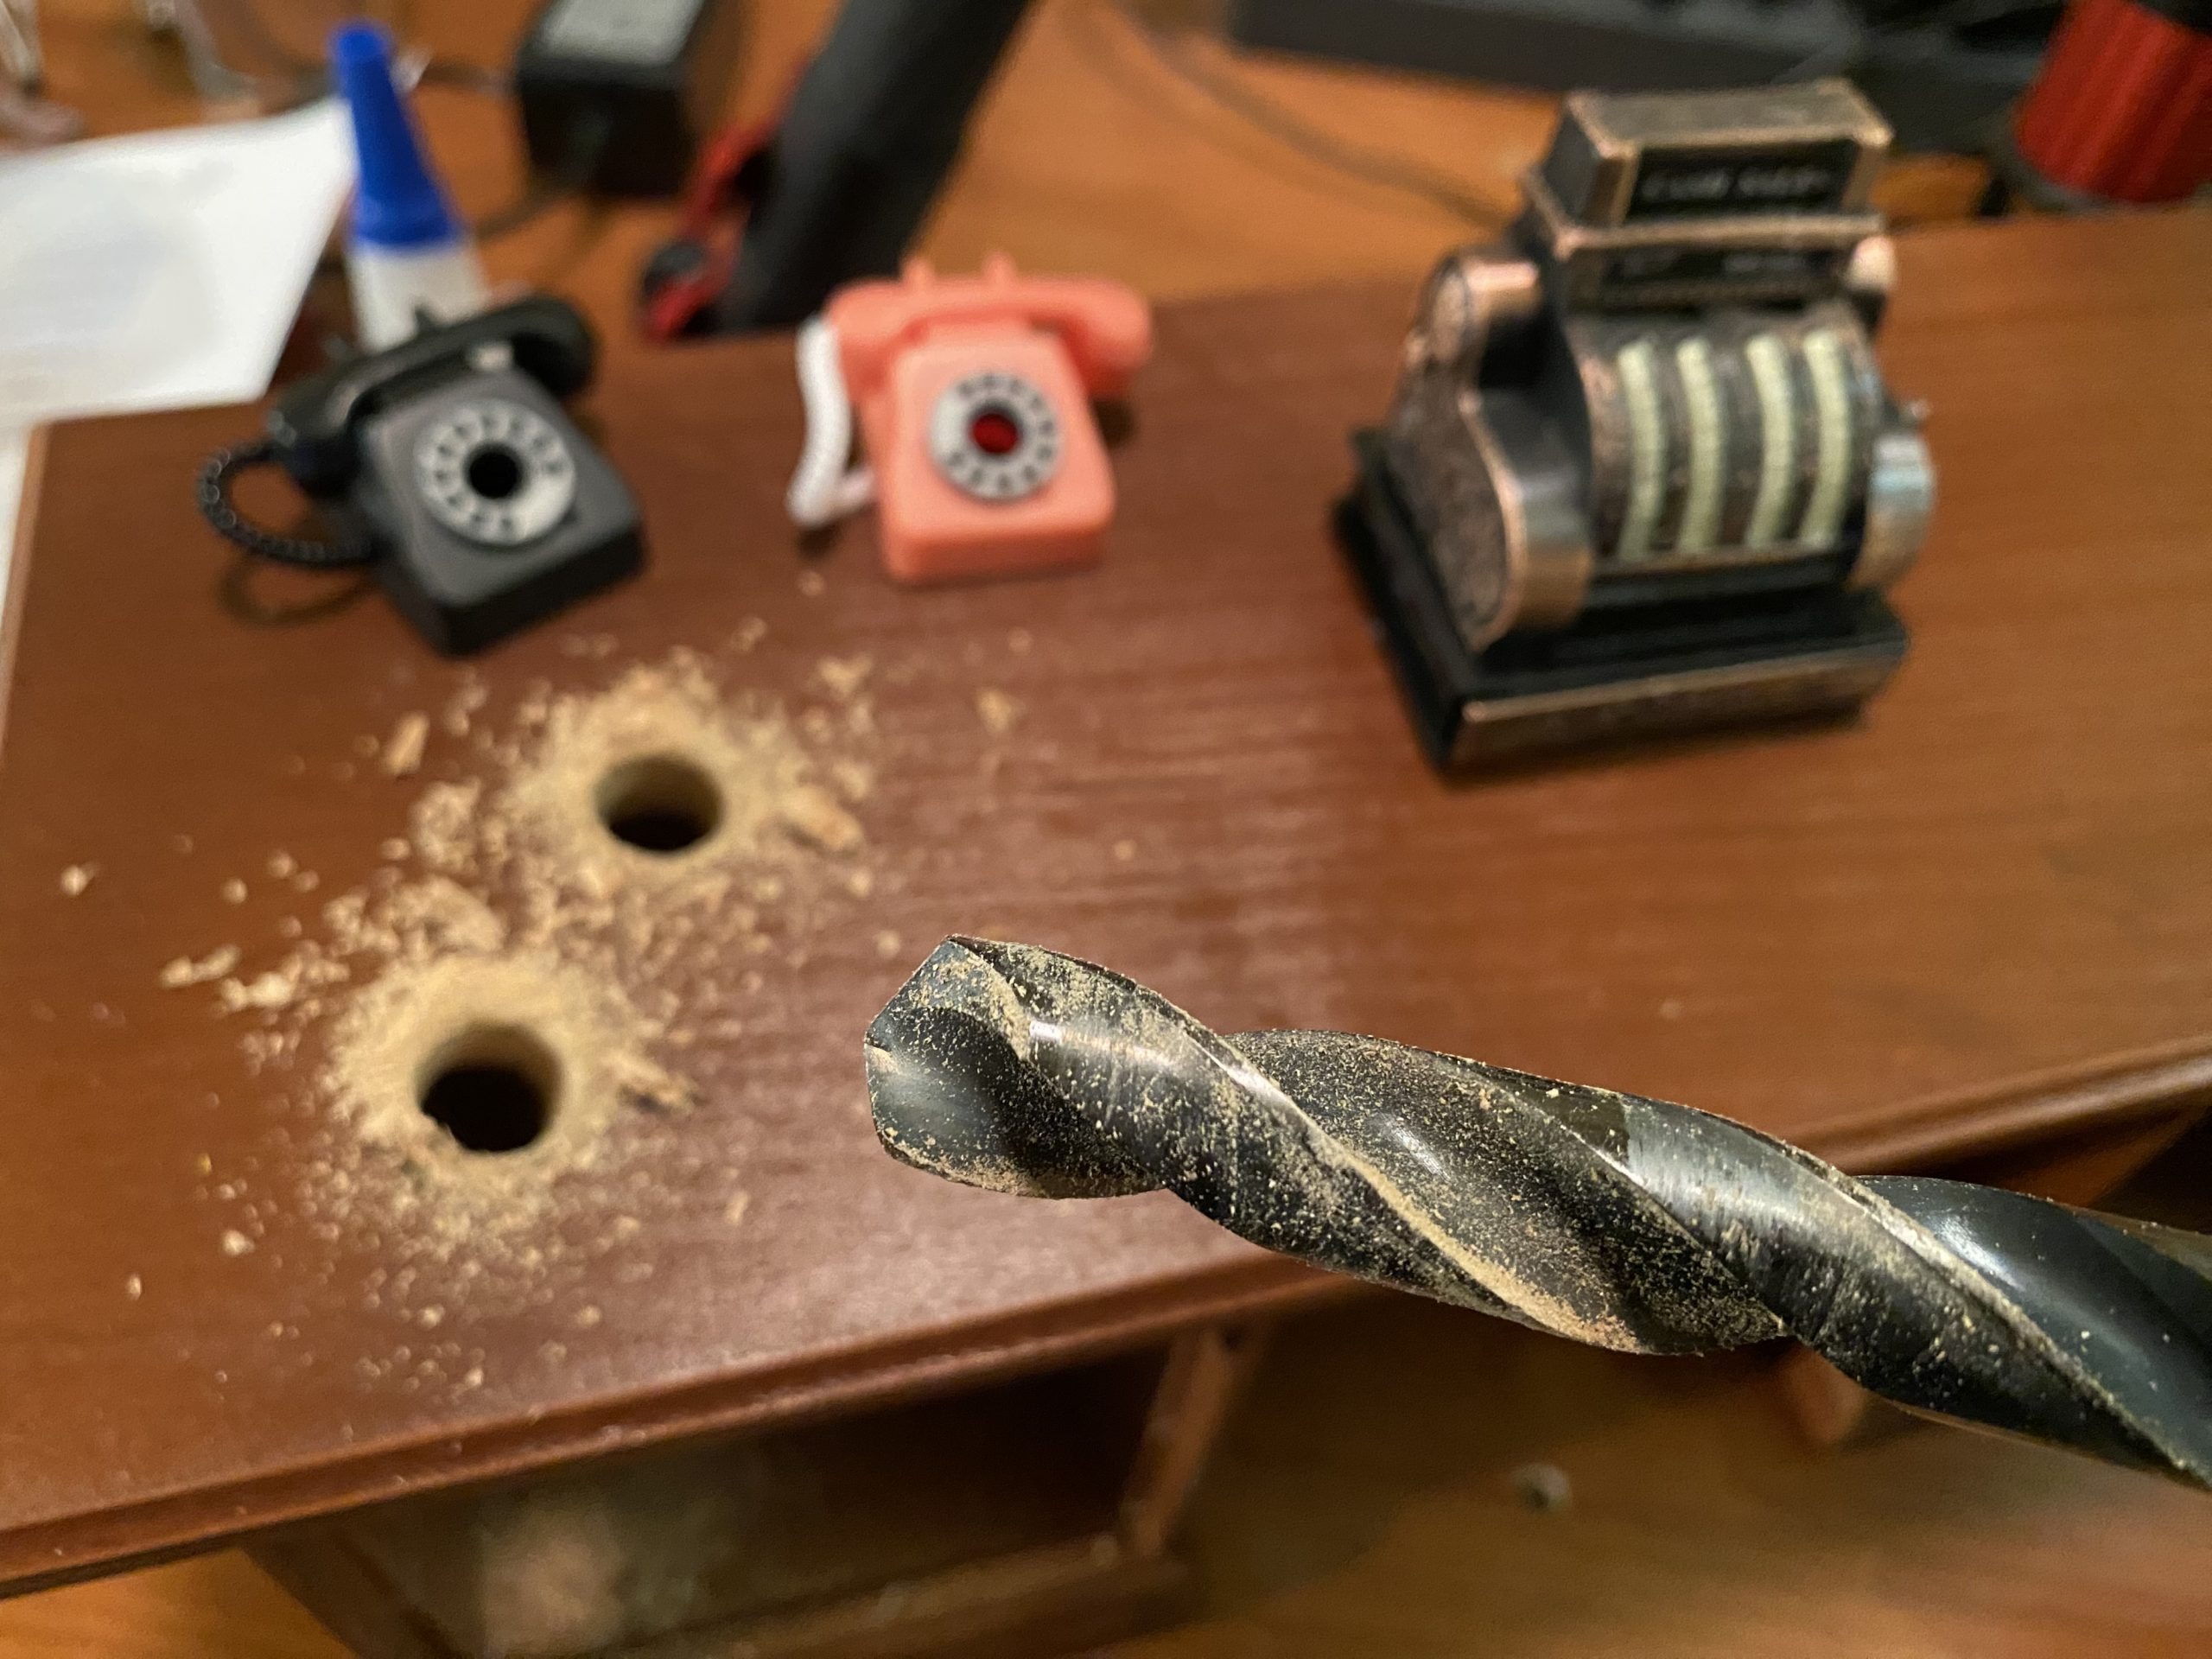
In the case of these little phones, the bulbs need to poke through at an angle, and the wires are stiff. So drilling holes through thin plastic, through pot metal, through 1/8” clear acrylic, and through a 3/8” basswood desktop is a rather delicate operation. Especially with dull bits and no drill press. Ace Hardware, by the way, charges way too much for drill bits.
Here’s proof of concept with none of the wires cut, routed and jacked yet. That beer stein only has water in it. The amber hue comes solely from its uplight. The cash register is subtle, but in the dark its translucent features glow nicely. The fake ice under the glass caviar dish is my favorite. The caviar is actually tiny translucent pink glass beads.
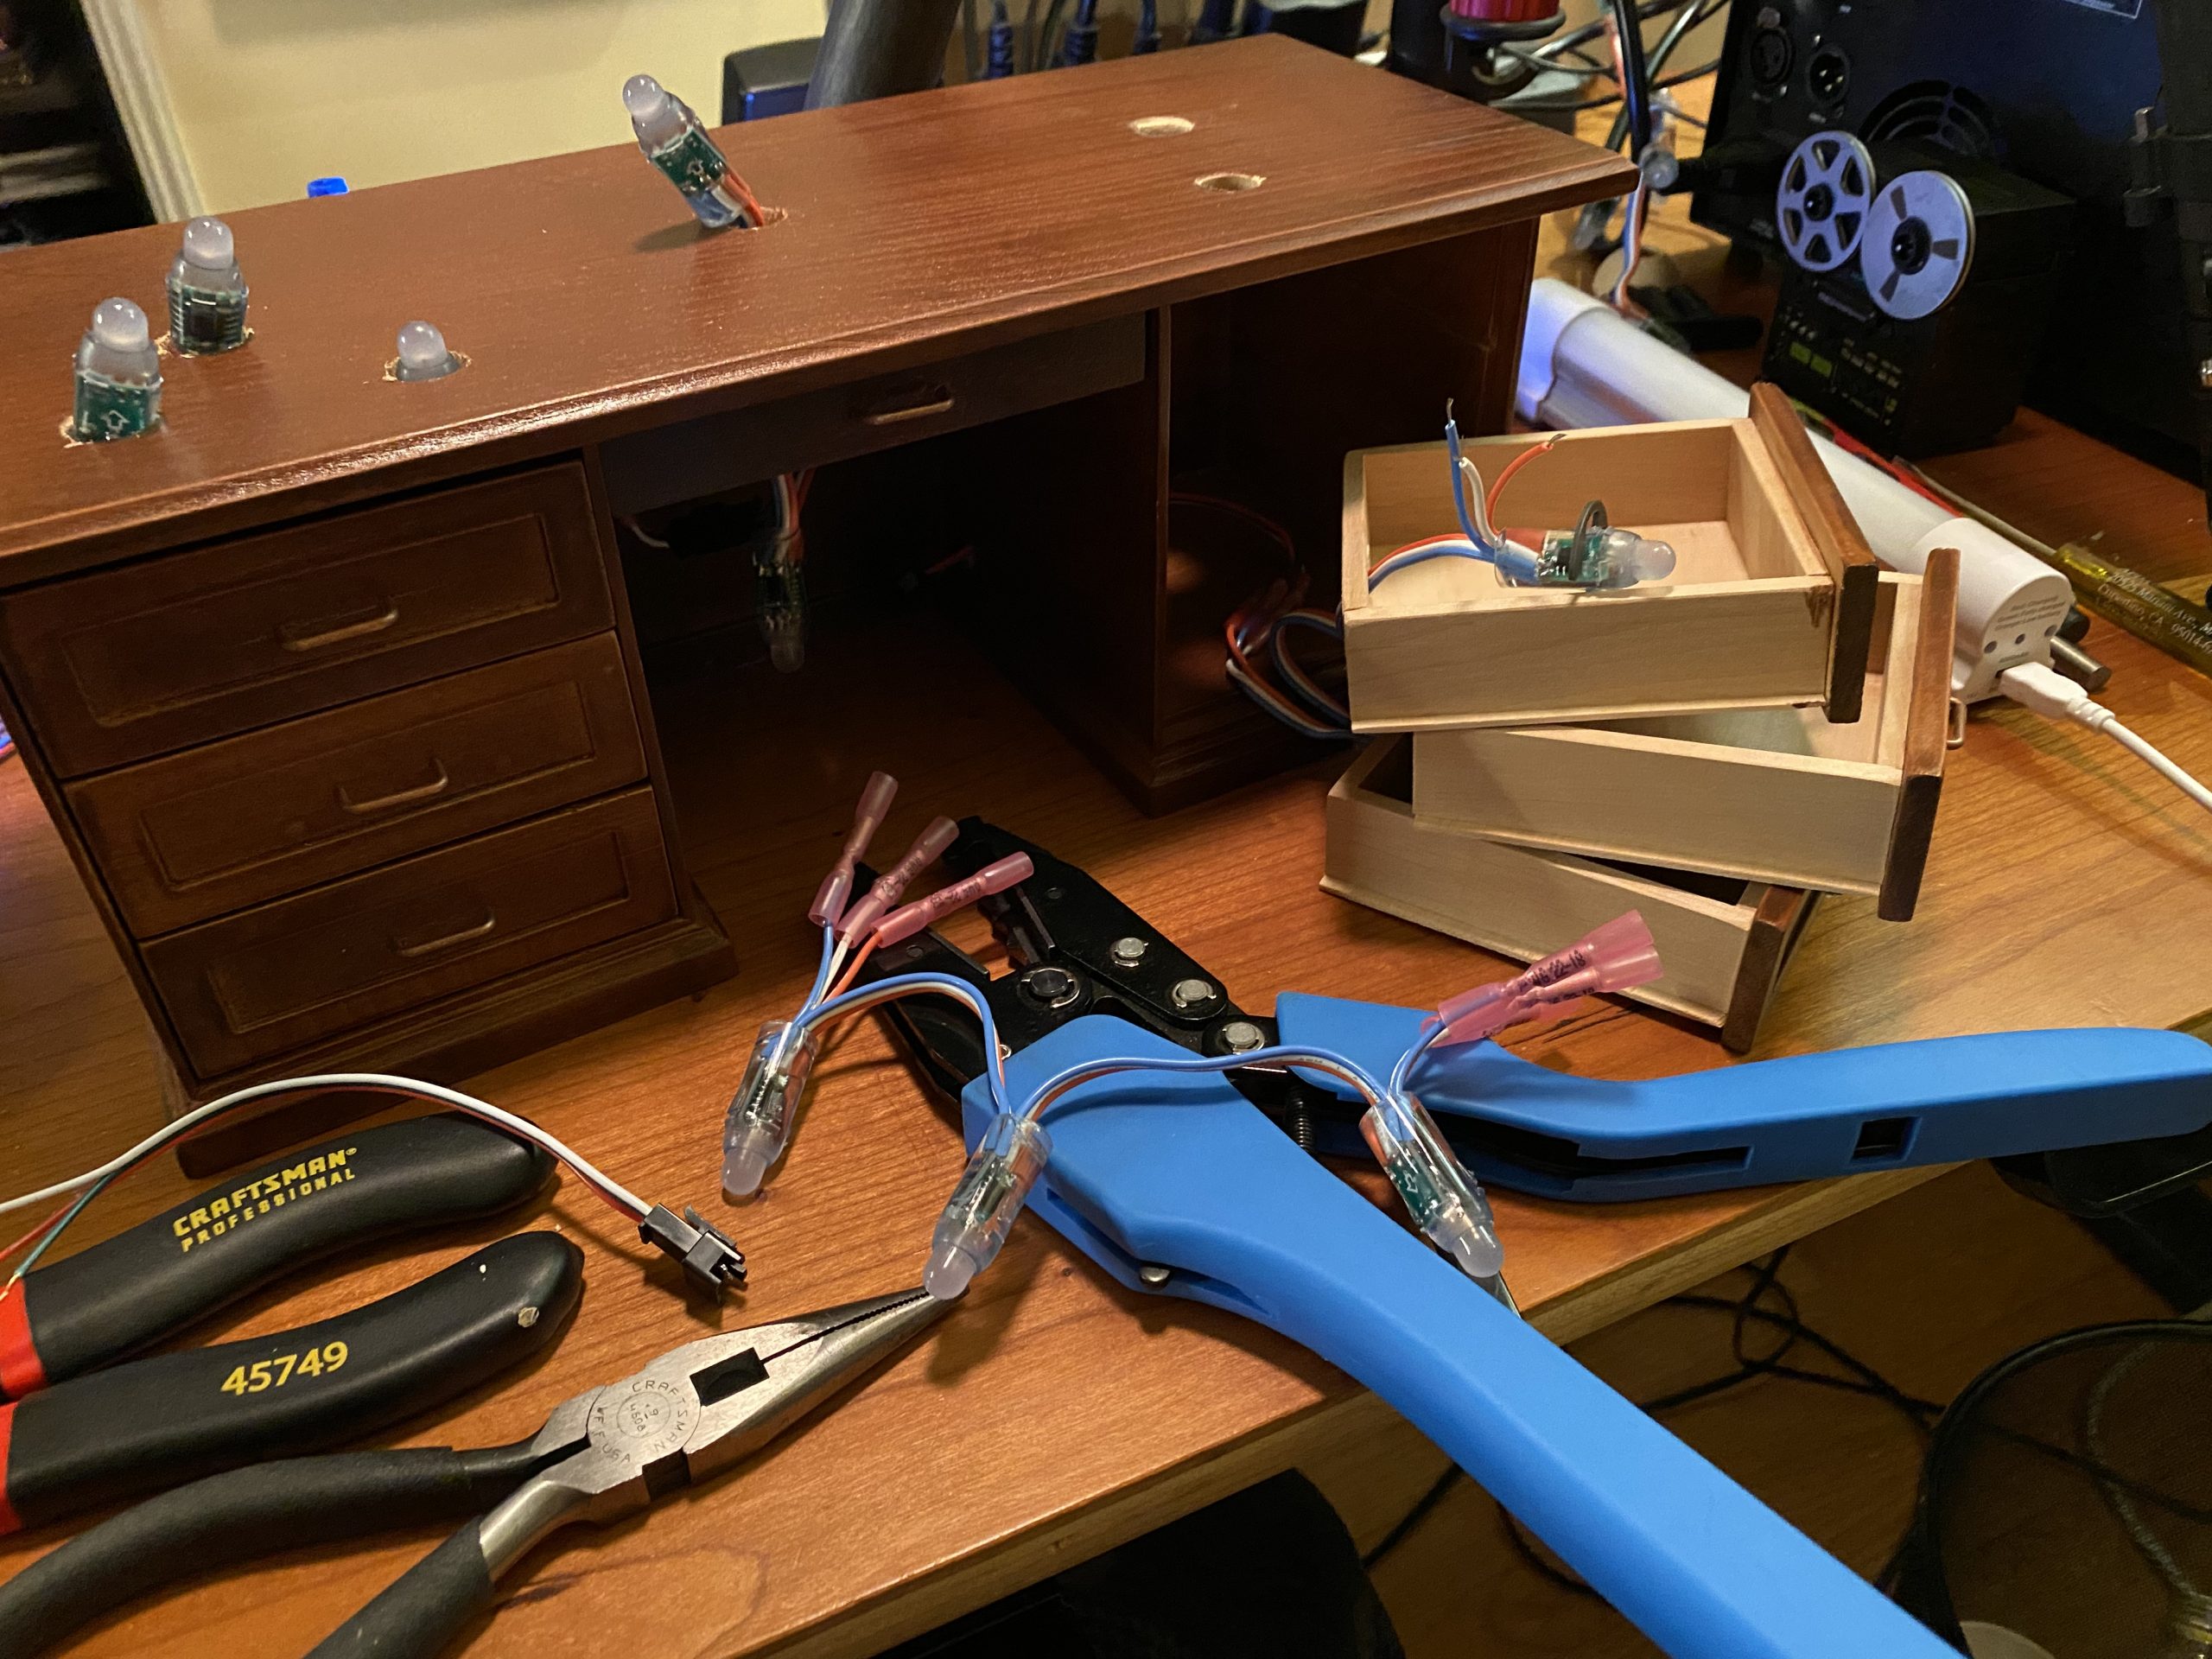
I spent the next day cutting and splicing wires using dozens of heat shrink butt splices and three-wire JST connectors, for modularity and to make installation even possible while leaving the drawers functional. No easy trick there, in such tight quarters. There’s got to be an easier way…
The design wound up with six lights up top, and two spares strategically tucked away for possible expansion. Then each of the six large drawers has a bulb mounted into its back panel on 12mm retaining clips, so that I can open the drawers and light up stashes of gold or diamonds or whatever.
So that’s 12-14 bulbs total, consuming 36-42 DMX channels given that each bulb has individually addressable data channels for RGB.
So how does DMX control these LED Pixel Bulbs? Well, to make white light, you send 100% to the red, green and blue channels, using the bulb’s assigned channel range (3 channels per bulb, in sequential RGB order). If you want, say, a shade of yellow, you send equal values to red and green, and set blue to zero.
When a couple more parts arrive today, I’ll daisy chain the desk’s DMX group after the drum kit’s group, which consumes 27-36 channels for nine bulbs and three spares.
So my DMX-512 universe will look like this:
Channels 1-35: Chauvet GigBar Move
Channels 36-71: Custom nine-piece drum kit
Channels 72-113: Custom uplit/backlit desk
Channel 114: Chauvet Hurricane haze machine
Channels 115-512: Unused for now
Dragonframe, my stop motion animation software, allows you to program DMX lighting sequences that sync with your animation frame-by-frame. So yes, this “power desk” will be pulsing with musical energy, along with my custom drum kit. And that’s the magic — the special effect no one will expect.
And here’s the final product with all the wires routed and jacked. Level of Difficulty compared to other things I’ve done? 7.5
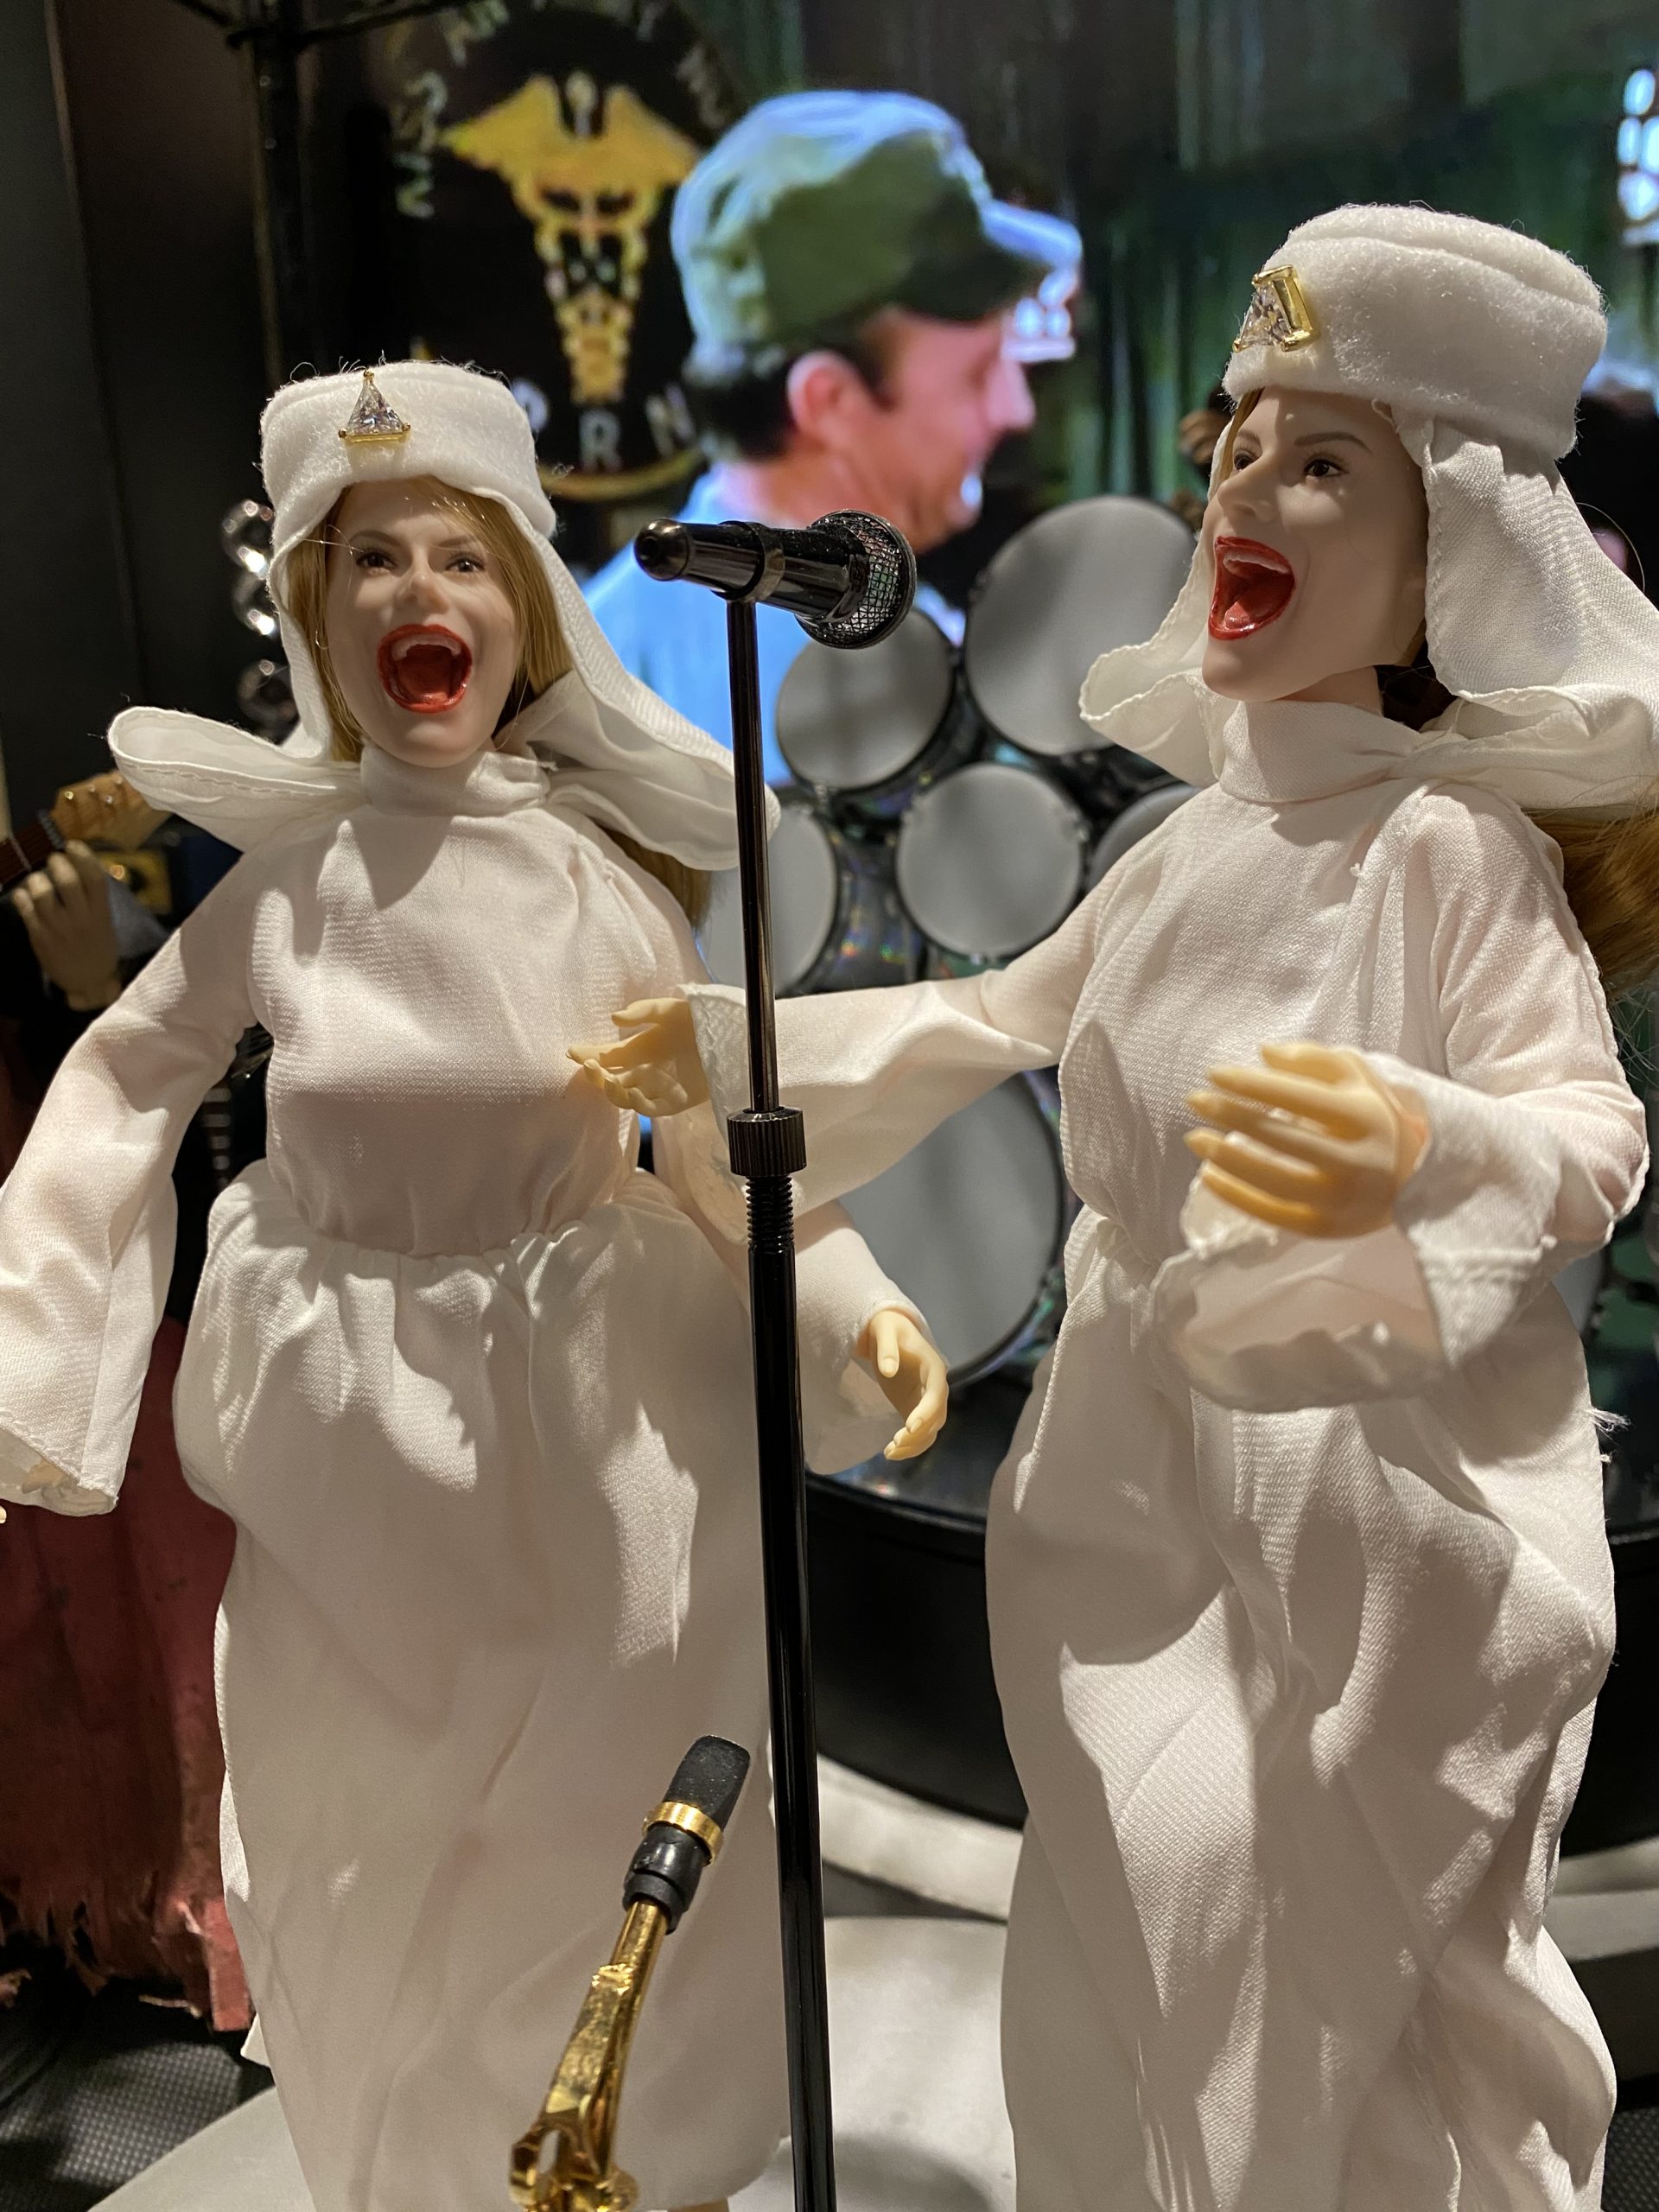
Two new characters have joined the cast of POSERS. You may remember the identical twins who ran Castle Anthrax in Monty Python and the Holy Grail. Well here they are again, warming up to sing backup for my upcoming episode.
One-of-a-kind puppets like this have to be kitbashed. That is, bashed together from multiple kits. A body here, a head there. A costume here, some jewelry there.
I found the pillbox hats on Etsy. Everything else was on eBay.
I try to buy from American sellers, but I wind up buying most of these pieces on eBay, direct from often shady dealers in China. That can take weeks or months. Or sometimes never, as in the case of Ukraine. And what I can’t find, I make myself or pay another artist to fabricate.
So tonight I’m running take 21 of this shot, which is 1807 frames long. There won’t be any animation performed until all the set pieces are in place, and all the MOCO and DMX programming are locked down.
Today my new Samsung Odyssey Ark 55-inch Curved 4K UHD monitor was delivered, a day early. I got it on sale at Amazon for $1999. This is marketed as a gaming display, and it got slammed in the reviews for its inability to display more than one HDMI source at a time. But that’s not a concern here.
While it can be pivoted into cockpit mode as shown, most of the time I’ll use it in landscape mode as a virtual backdrop for my POSERS sets. Dragonframe allows me to synchronize any video with the frames I shoot, and that video can be displayed on any external display. That means no more crappy green screens for me, casting that unavoidable green taint on my characters.
POSERS is all about the photons, so it’s only original photons from here on.
In 2004 I made a deal to acquire the scenario.com domain for $1,200. That felt like a lot of money back then for an indie game maker like me. But in March 2023, I sold it for $100,000 and replaced it with scenario.org for $3,995. I only wish I had acquired scenario.org back when it could be had for $1!
This was a very challenging move, much like packing up and moving to a different house — all while the clock is ticking against you to meet your escrow deadline. That involved updating 19 years worth of website accounts that were tied to scenario.com email aliases. Around a thousand in total, each business with their own Draconian rules for how to go about updating a simple email address in their databases. And then came the challenge of waiting for the Registrar transfer, convincing my bank this wasn’t a fraudulent charge, waiting for the DNS records to update, then updating all the pages on this site, plus its SQL database, my hosting contract, and the WordPress admin settings — which was like pulling teeth to get any help tracking down all the things that got broken. Again, it’s a simple global string change. Or at least in theory.
But now here I am, having achieved my stated goal of swapping three letters of the alphabet for a pile of cold, hard cash during a global recession. Sigh…
As for the new owner of scenario.com, check ’em out! They have a pretty cool business, producing AI-generated game assets. And I’m so glad they weren’t a porn site, given that their identity was kept anonymous until their site appeared at my old URL. I wish them all the best.