It’s been a few days since my last update because we decided to reassemble the RETROvan just enough to enjoy the last few days of sunshine here in the Portland area.
Olivia and I had fun watching the World Series and we even moved our hot tub from the back acre to the RETROpad, directly outside the door and through the hops garden:
The charcoal finish on the woodwork looks amazing! I just need to install the white doors and Velcro the cushions in place now. Photos coming soon.
Here’s a better shot of the inside of the helm now. AC on the left, DC on the right. Inverter and batteries below. Some day I’ll add a bus bar or fuse block in the upper center area.
I’m testing an INSTEON security camera, and yesterday I installed a chrome grab bar to the helm to help our friend Diane get in and out.
I just got my waterproof Ethernet connectors, so I drilled a 7/8″ hole in the hull, next to the shore power inlet. So at least now we can open and close the door without a cable blocking the way. I’ll have to remove panels tomorrow to install all the Ethernet cables to and from the AirPort Extreme, which acts as a network hub. The part above goes in the wall. The part below goes on the cable:
Today my other goal is to figure out the galley plumbing. These are the components I’m dealing with: This is the Kingston Brass sink that fits in the galley countertop. I’ll need to buy a drain assembly for it. That drain will go out the back of the galley cabinet, which you may remember is a modified HUSKY stainless steel tool chest from Home Depot. From there the drain will flow to a gray water tank.
This is my Delta Peerless wall-mount faucet. It has hot and cold handles, but they’ll both serve up cold water because I don’t really need a water heater. Hot water can be made in the microwave oven in a pinch. I’ve already cut the two water supply holes in panel D2, but the trick will be how to support the substantial weight of the faucet from behind that panel.
And this is the SHURflo 12V pump that will push water up six feet from the fresh water tank to the faucet on demand.
I will also have to buy two water tanks and mount them under the chassis. Not looking forward to that. I have 1/2″ braided nylon hoses to connect everything, but I’ll have to figure out all the fittings. And I might wind up using PEX tubing instead.
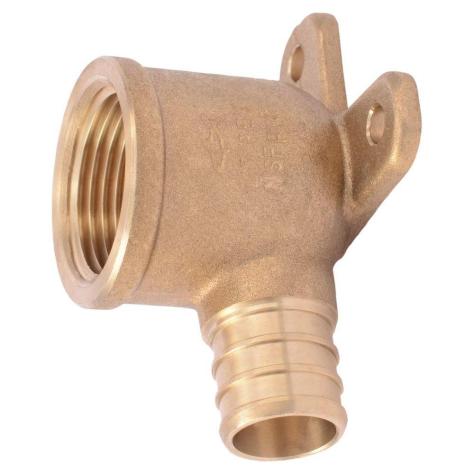
For supporting the faucet from behind the wall cavity, I’m thinking about using something like this:
This is called a drop elbow, with mounting ears. I would screw two of them into a piece of marine plywood at the right distance apart (about 9 inches for my faucet holes). Then the plywood can rest atop the horizontal wall rib and mount between the two vertical wall ribs with angle brackets. From there, it’s just a matter of attaching the 1/2 inch supply hoses to the barbed fittings. They can run down to a tee fitting that connects to the pump’s outlet.
I haven’t yet decided where the pump will mount. The easiest access would be in the bottom of the galley’s sink cabinet. But then it would be loud and it would take up valuable storage space. If I put in inside the galley’s base cabinet, it’ll barely fit and if something goes wrong I’d have to take everything apart. If I put it under the chassis, then I have to build a box to protect it from the elements. So that’s probably out. So it looks like the bottom galley cabinet wins.
That’s the plan so far. It’s still evolving, so stay tuned…
Meanwhile, I put the Batmobile and a Bat Signal up on the temporary shelf, over the driver’s seat. How cool is that?


