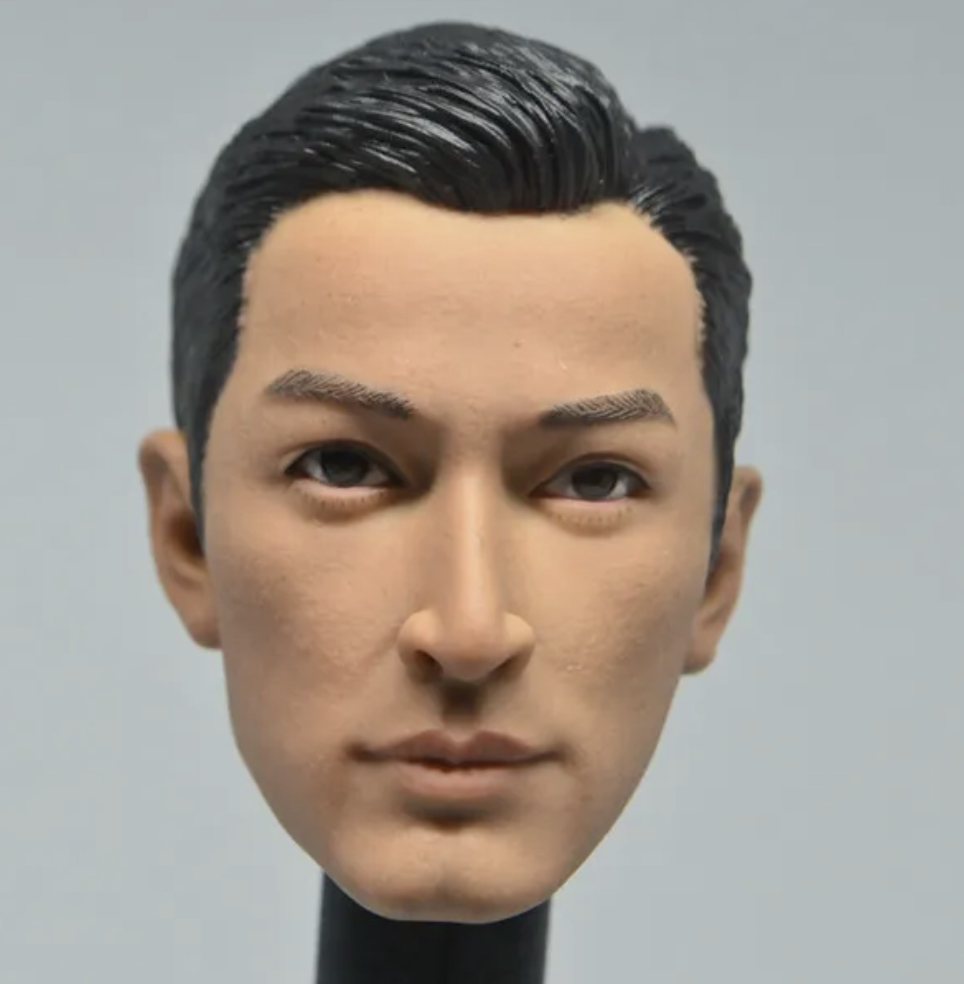
I’ve long had a good head sculpt for Ivanka Trump, and I finally found a decent likeness of Jared Kushner to add to POSERS 9.
He’s lanky, so these JIAOU bodies are the best match. It’s just a question of which skin tone. Pale would be funny, but natural looks like a better match.
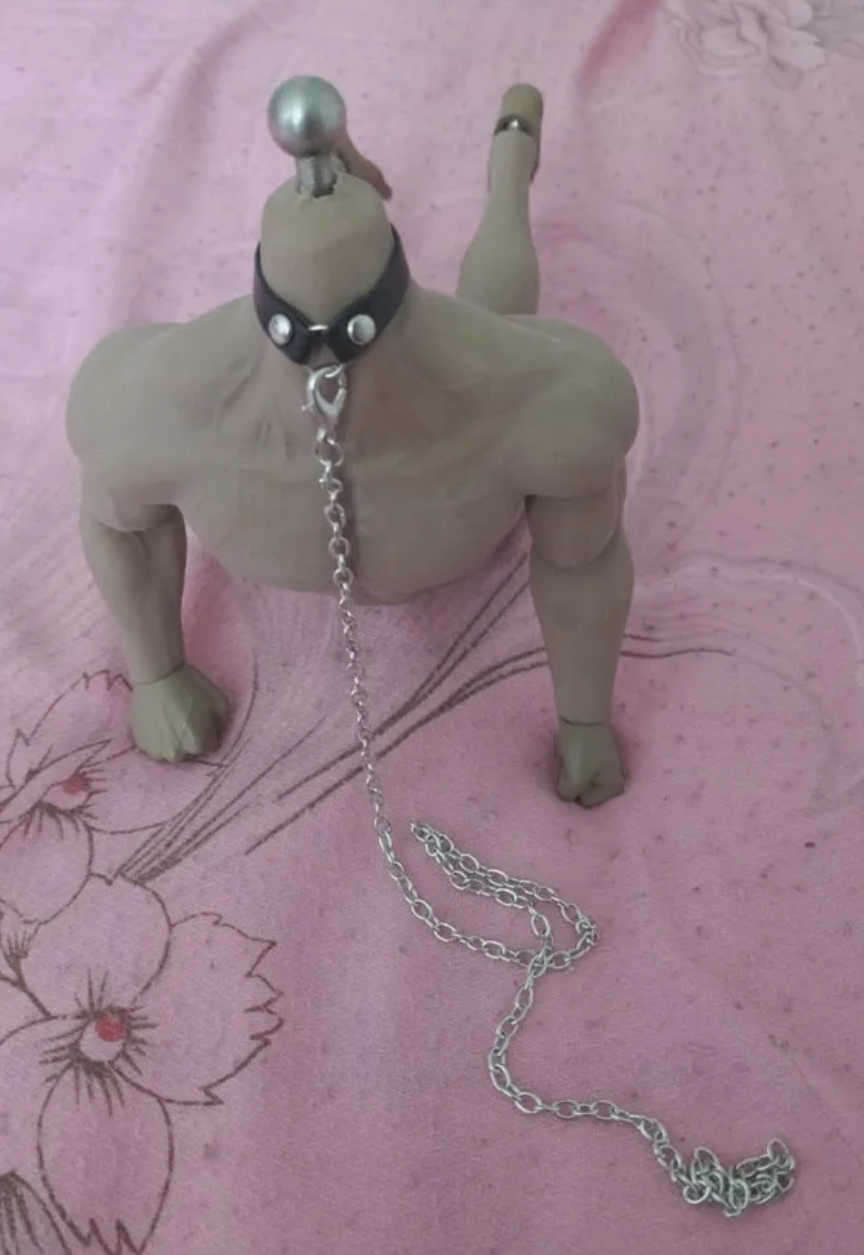
I’m thinking of dressing him up like a gimp, on Vonky’s short leash.
Who can’t picture Jared wearing bulge-less manties, black socks and sandals when he and Ivanka meet Prince Bonesaw at Bedminster? 😂
Ivanka will make her fourth costume change into this $36 getup.
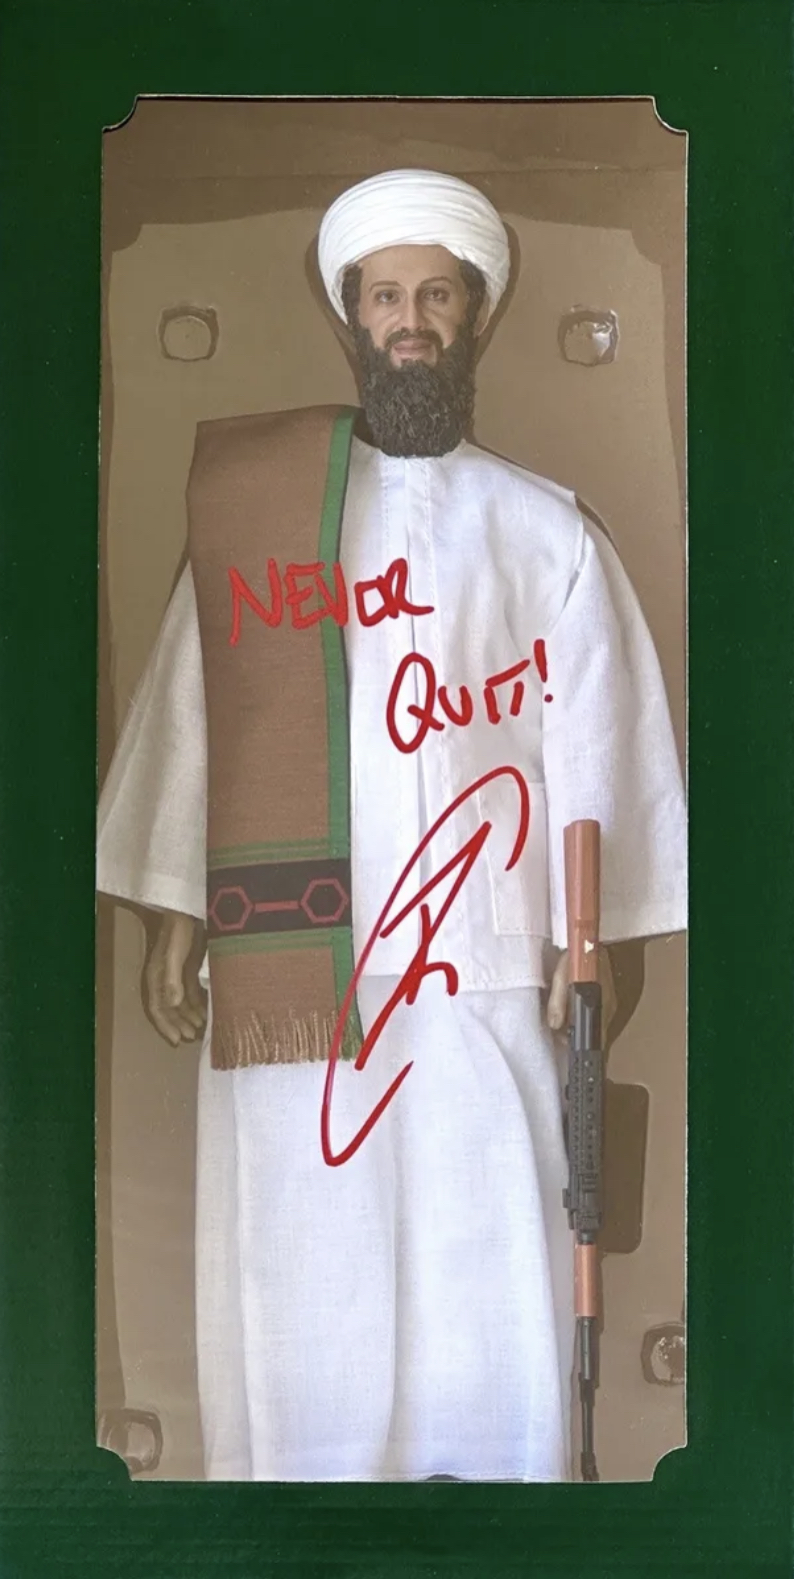
While waiting for some last minute props to arrive from Wales for Dark Side, I started work developing a new character for POSERS: Crown Prince Mohammed bin Bonesaw Al Saud
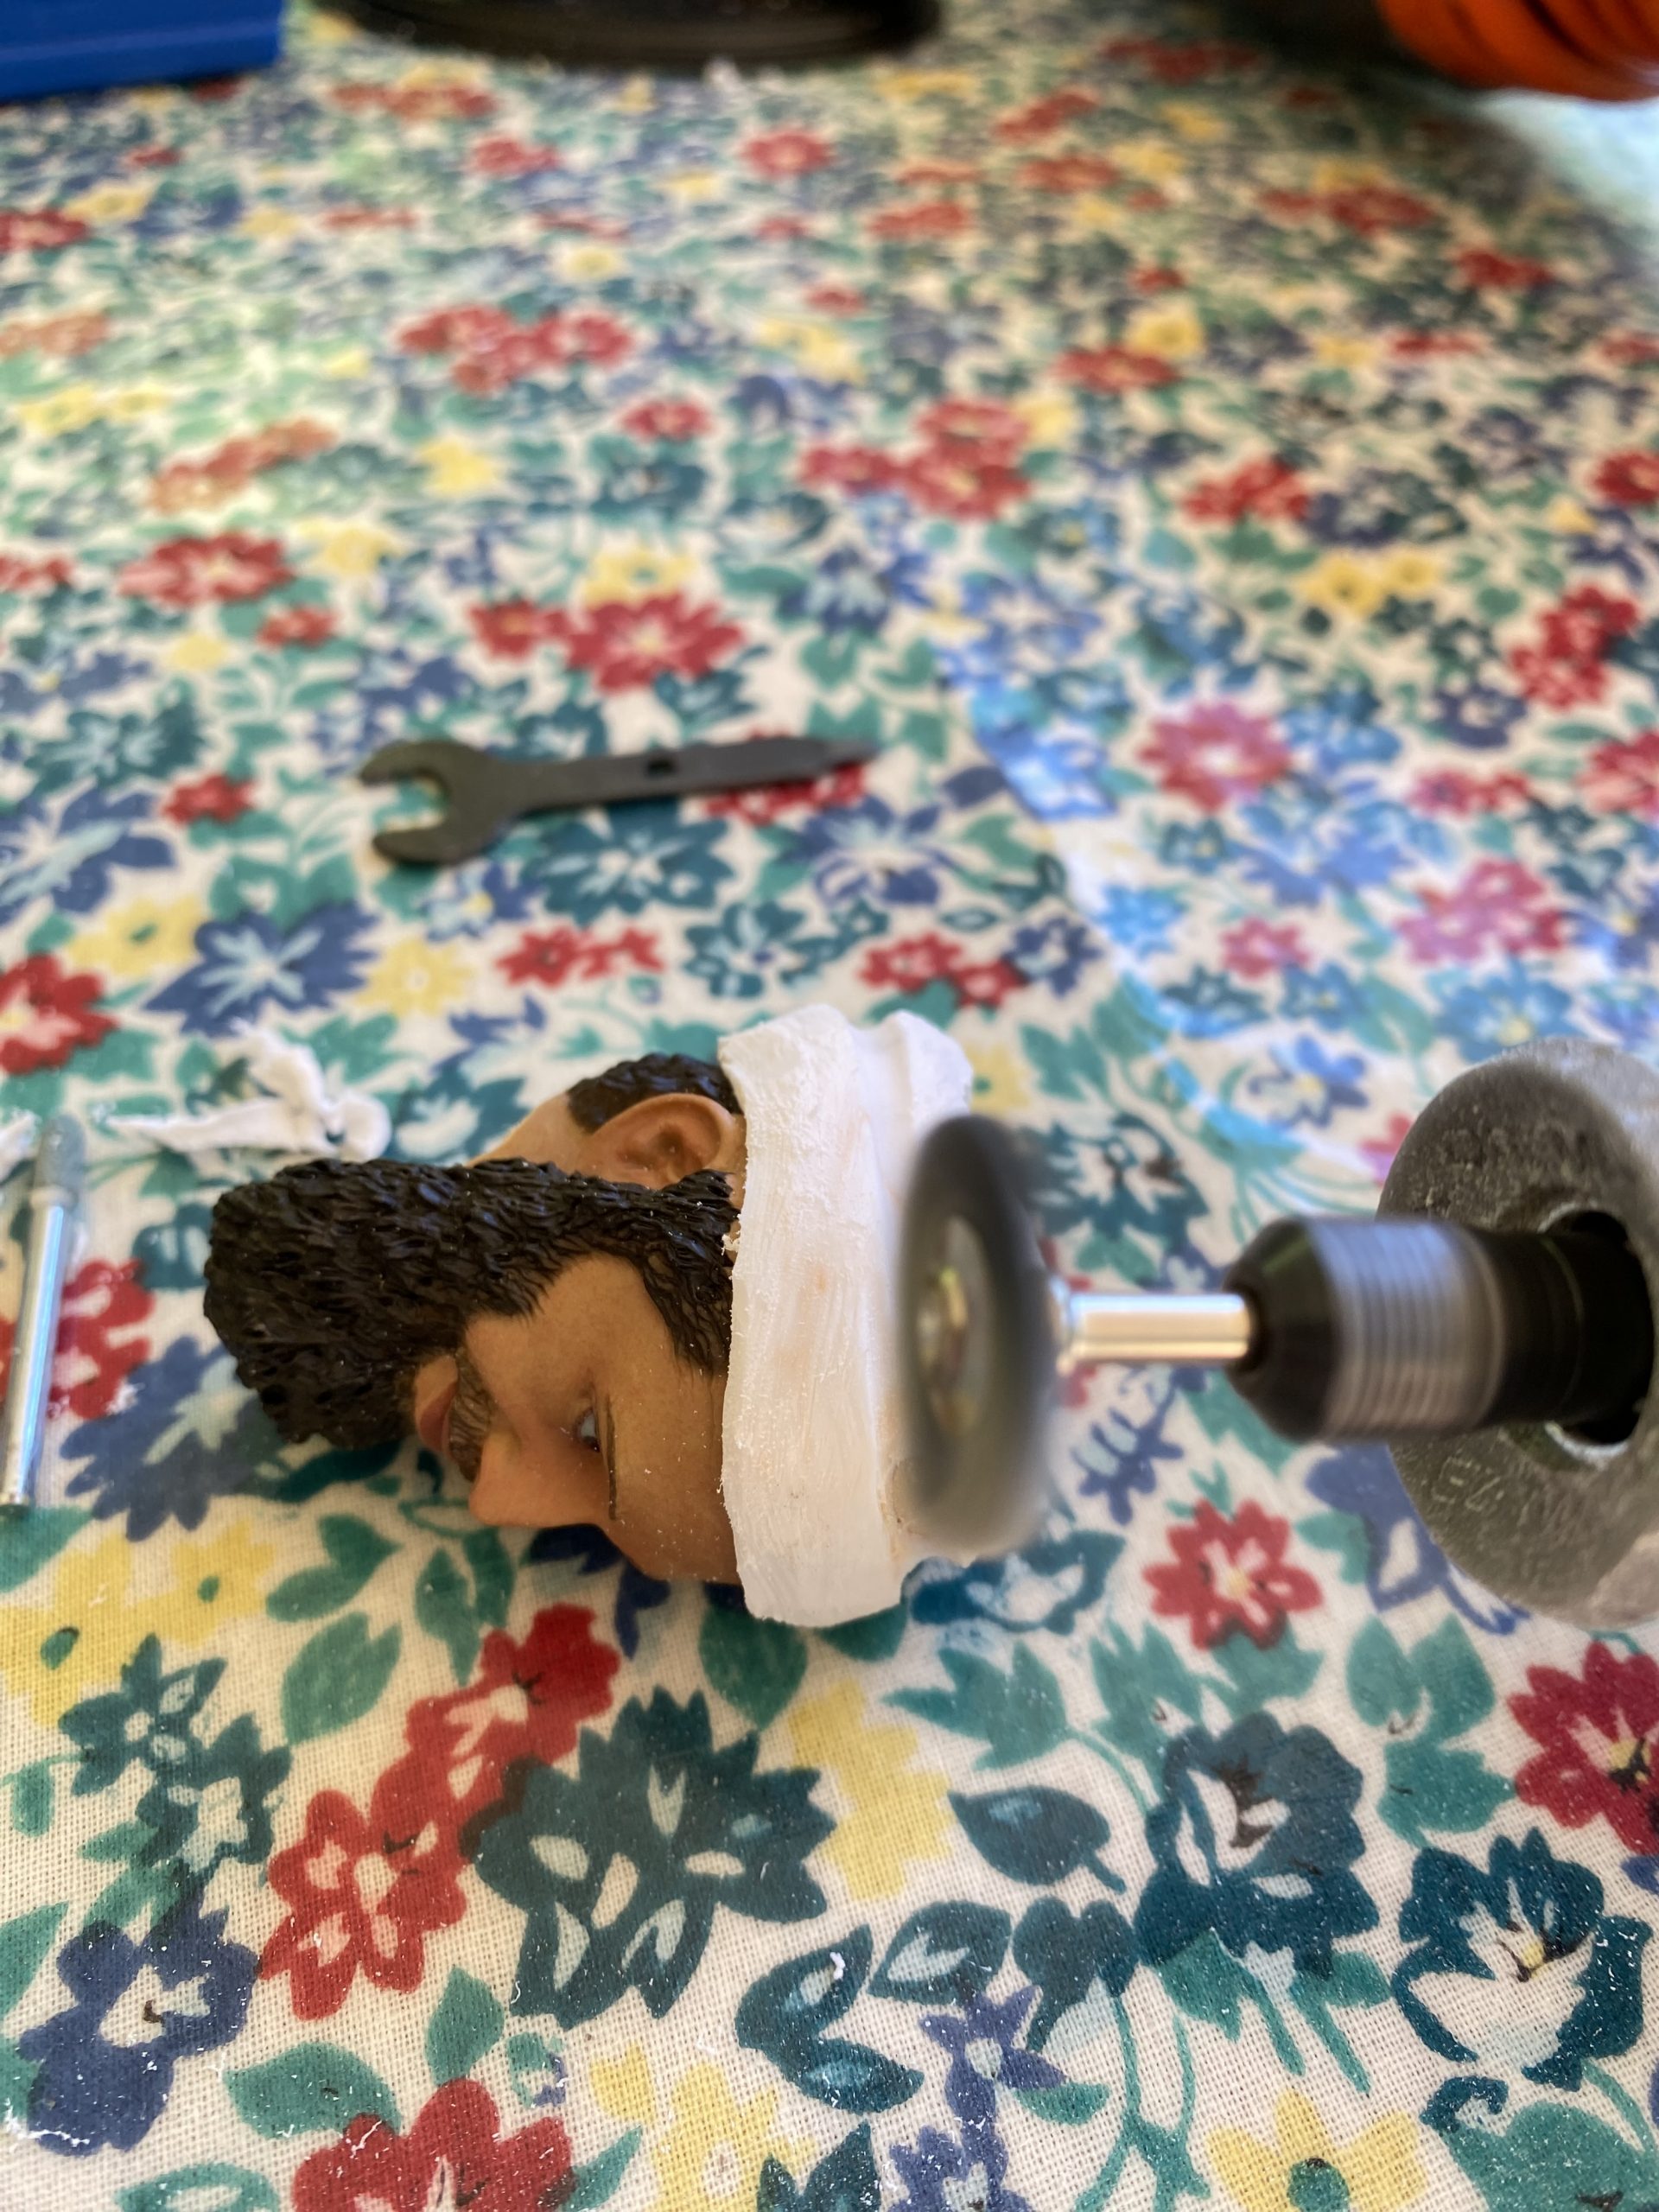
Since there are no 1:6 scale Arab sheik action figures on the market for obvious reasons, I have to kitbash one from the only suitable character available: Usama bin Laden.
It turns out the Navy SEAL who killed UbL in 2011 commissioned 911 of these figures and Senior Chief Petty Officer Robert O’Neill has been auctioning them off on eBay. So I snagged one for $229.50 with shipping.
The head sculpt and costume are very good, but the cheap body is unsuitable for stop motion animation. So I unglued the sandals and swapped the body out for my go-to Phicen M31 body that has a stainless steel armature and 31 points of articulation. That required me to cut off 3/8” of his neck with a Dremel, up to his hairline, and then drill a 3/8” hole into his skull for the steel head post to fit snugly.
The next challenge was to find suitable material for MbS’s shemagh, or head dress. The closest houndstooth pattern I could find was from an Etsy seller in Hungary. All the fabrics I could find locally weren’t the right scale nor fine enough. The scarf I received had to be carefully unstitched to make it bigger. That took about two hours because the stitching was very professional.
The UbL head had a white resin turban molded onto his skull, and it was comically too big for MbS. So to fix that, I ground it down and then routered a groove around it — all with Dremel bits.
So now, the shemagh lays flat and with two black hair scunchis stacked and snapped into that trough, the fabric is held in place securely enough to allow rough handling during animation.
He looks pretty close to the real asshole now except for the length of his face bush. I’m trying to decide whether to cut 3/8” off of that. If I do, I can use my finest Dremel bits to carve some curls back in and then match his hair color by mixing acrylic paints.
Without revealing too much about my POSERS scene, Prince Bonesaw will be visiting the LIV golf tournament at Bedminster, where he completes his $2B purchase of America’s war plans against Saudi Arabia’s arch enemy, Iran.
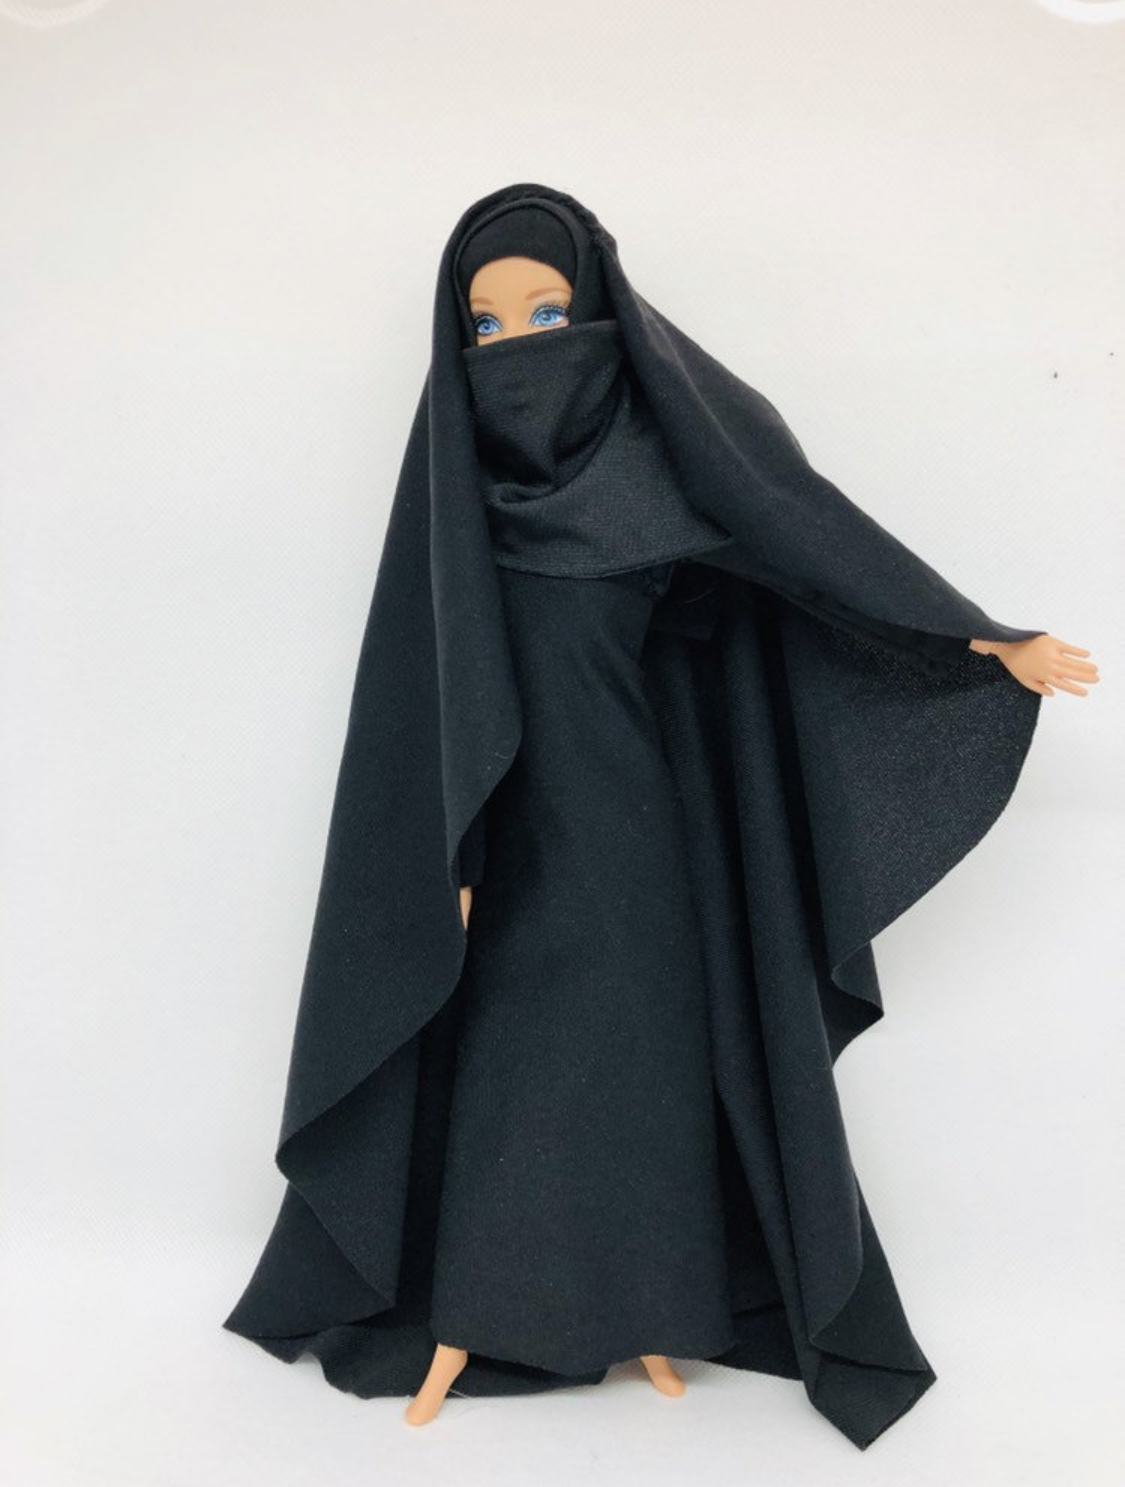
His props, so far, include gold-rimmed aviator style sunglasses, an actual 1:1 scale field bone saw, and a 1:6 scale golf cart full of not golf clubs, but surgical instruments. And he’ll be accompanied by a hit squad of four box-cutter wielding Barbie assassins dressed in black burkas, made by an Etsy seamstress in Virginia.
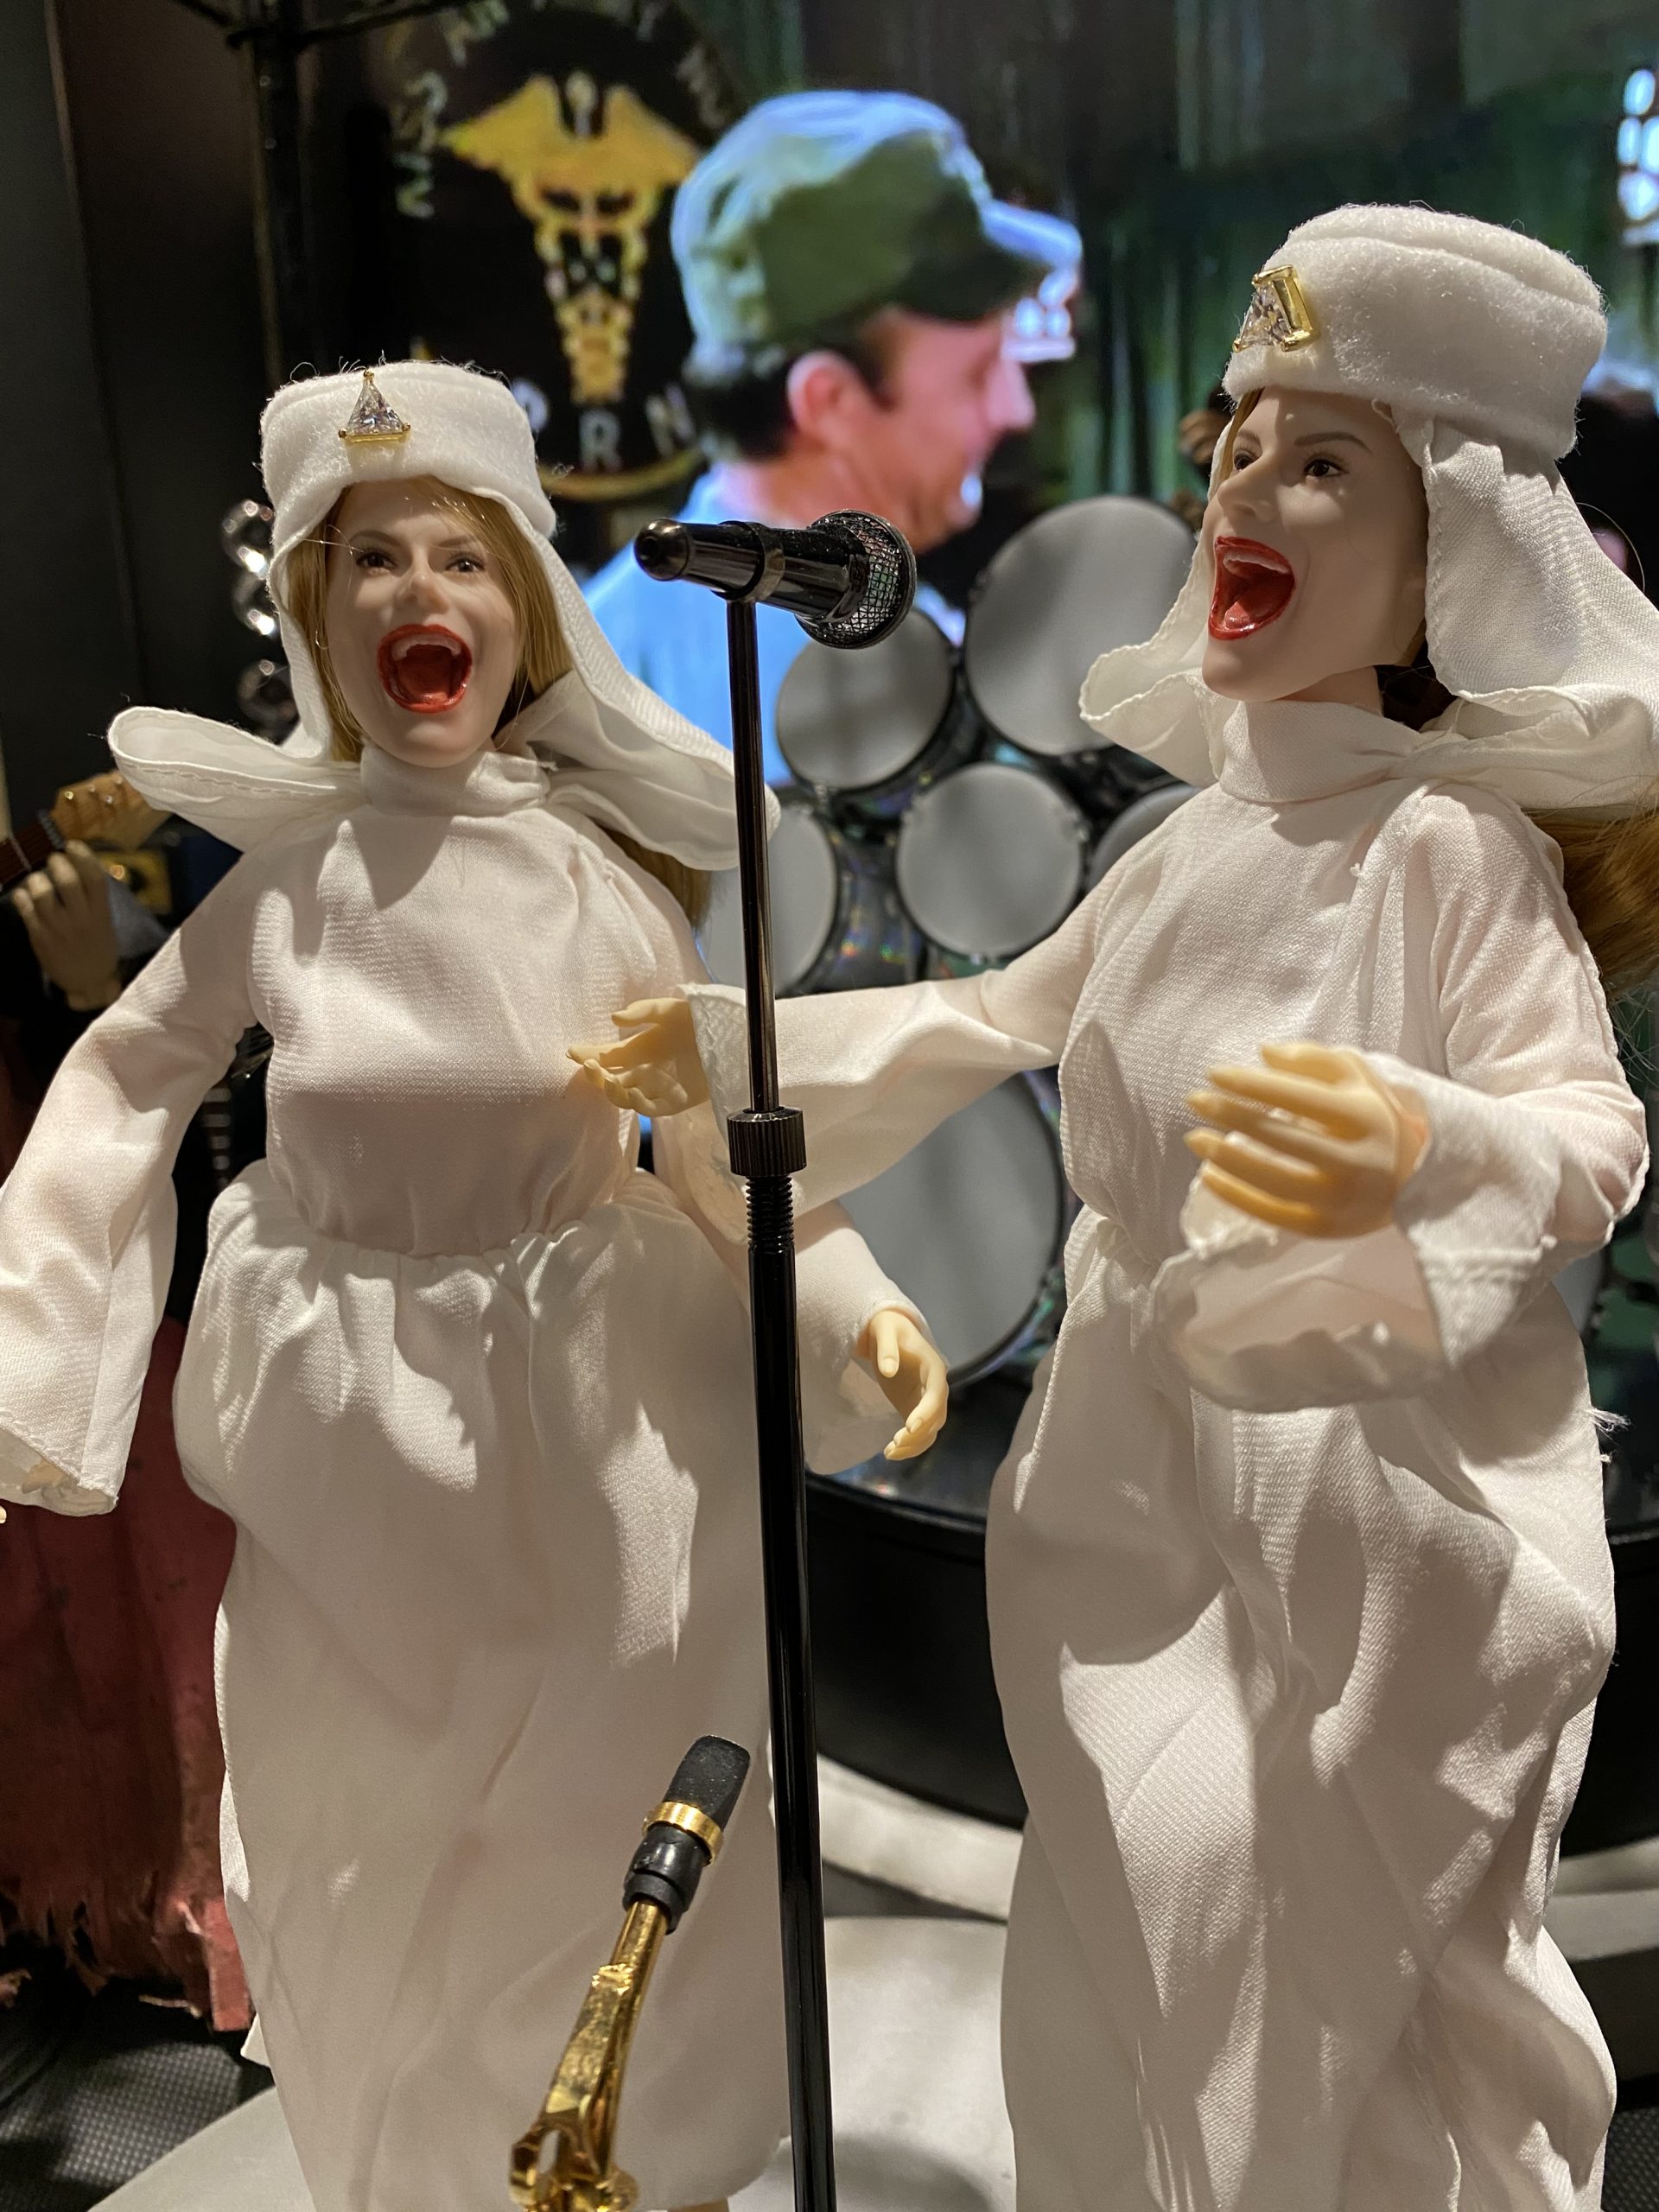
Two new characters have joined the cast of POSERS. You may remember the identical twins who ran Castle Anthrax in Monty Python and the Holy Grail. Well here they are again, warming up to sing backup for my upcoming episode.
One-of-a-kind puppets like this have to be kitbashed. That is, bashed together from multiple kits. A body here, a head there. A costume here, some jewelry there.
I found the pillbox hats on Etsy. Everything else was on eBay.
I try to buy from American sellers, but I wind up buying most of these pieces on eBay, direct from often shady dealers in China. That can take weeks or months. Or sometimes never, as in the case of Ukraine. And what I can’t find, I make myself or pay another artist to fabricate.
So tonight I’m running take 21 of this shot, which is 1807 frames long. There won’t be any animation performed until all the set pieces are in place, and all the MOCO and DMX programming are locked down.
In 2004 I made a deal to acquire the scenario.com domain for $1,200. That felt like a lot of money back then for an indie game maker like me. But in March 2023, I sold it for $100,000 and replaced it with scenario.org for $3,995. I only wish I had acquired scenario.org back when it could be had for $1!
This was a very challenging move, much like packing up and moving to a different house — all while the clock is ticking against you to meet your escrow deadline. That involved updating 19 years worth of website accounts that were tied to scenario.com email aliases. Around a thousand in total, each business with their own Draconian rules for how to go about updating a simple email address in their databases. And then came the challenge of waiting for the Registrar transfer, convincing my bank this wasn’t a fraudulent charge, waiting for the DNS records to update, then updating all the pages on this site, plus its SQL database, my hosting contract, and the WordPress admin settings — which was like pulling teeth to get any help tracking down all the things that got broken. Again, it’s a simple global string change. Or at least in theory.
But now here I am, having achieved my stated goal of swapping three letters of the alphabet for a pile of cold, hard cash during a global recession. Sigh…
As for the new owner of scenario.com, check ’em out! They have a pretty cool business, producing AI-generated game assets. And I’m so glad they weren’t a porn site, given that their identity was kept anonymous until their site appeared at my old URL. I wish them all the best.
This 184-frame shot took two days to shoot, on twos. It started off as a simple idea, but like most things in POSERS the characters take on a life of their own. I was originally going to shoot the Black Knight hopping around on the bridge, after getting his arms and legs severed by the Jeep collision, and leave it at that. So I centered my 6-foot muddy road on my cyclorama and then instead of green-screening a background, I decided to wrap some of my plastic topiary panels around it to create a ravine. To keep it in place, I drilled two screw holes into my cyclorama frame. But half way through the shot, I bumped the left side and caused it to move, unrecoverably. So the trick here, as usual, was to add something that might have caused that disturbance. And that something was King Kong, who was in mid-fight with Godzilla in Shot 902.
Still waiting on a key $395 set piece for this scene that is held up in transit due to Russia’s war against Ukraine. The artist lives in Siberia, and the tracking information hasn’t been updated from Moscow since February 12.
In the meantime I have transformed our master shower into a cavernous fern grotto-like BDSM dungeon attached to Amanda & Sushi’s minka. Here we’ll see our supervillains holding Mona Lisa hostage.
The shower will be filled with about 4″ of water, using a silicon drain stopper. The 12 acrylic stands you see will act as pilings, supporting four stepping stones, two fire pits and the 1:6 scale timber BDSM rack.
Here’s the list of props I’ve used to build this set:
Act 7 of POSERS will see the return of our Giant Asian Murder Hornet puppets. I hadn’t planned to reveal where they came from, until I was faced with needing a ceiling in Amanda & Sushi’s Japanese minka — their supervillain lair. So then it hit me that I could solve both problems at once, by designing a ceiling that was also a nest. Creepy? Yes!
This is the photo that inspired me. I researched as much as I could about bees, wasps and hornets — and I’ve always been intrigued by them. Especially how they build, how they communicate and how they organize themselves to do the Queen’s bidding.
My first prototype looked good at first, but it wasn’t stiff enough to support its own weight. I used card stock for this, folding each tube into a hexagon shape. But you can see what happed after I coated them with papier-mâché. They became stiff, but they deformed way too much.
So next I found some rather expensive white cardboard called chipboard. This prototype was a success. It took a lot more labor, however, as I had to score each fold with an Xacto knife. In the background you can see a woolen dryer ball. That ball’s diameter dictated the size of each comb. I will stuff those balls into the ends of a few combs to look like silk cocoons that haven’t yet hatched. The hexagon sides turned out to be 1-1/4″ each.
I made about 140 of these combs and glued them onto a 2×4′ sheet of corrugated cardboard. Notice how they vary in height. The average hornet comb has about a 2:1 ratio of height to diameter in real life. I also left gaps in the honeycomb pattern, to give it more of an authentic organic quality since hornets don’t use rigidly structured bee apiary panels. Today I’m going to squirt some yellow foam sealant into the joints to make it look like waxy build-up. (Hornets don’t produce honey.)
I got pretty excited to learn that cocoon silk glows under blacklight, since I’ve shot many scenes in POSERS using UV lamps and UV-reactive materials and paints. So I found special spray paint and a string of blacklight LED “fairy lights” that are programmable. These lights are spaced four inches apart, which is perfect. I poked a hole at the base of each comb and then on the back of the cardboard, I fashioned a circuit board by bending and poking each LED up into the hole. Then I secured all the wires with Frog Tape across each row.
Here are the wool dryer balls. I bought two bags of nine. I originally thought I could just cut them in half but they proved too difficult to set in the tubes that way. But I’ll use fibers and clumps from the cut-up ball to glue debris in the honeycomb. That will look like cocoons that have hatched but haven’t been cleaned out of the nest yet.
And finally, here’s one of the Giant Asian Murder Hornet puppets I’ll be using. These came out of Japanese capsule toy vending machines, ordered through eBay. I already had a set of three but decided to buy three more.
The nest was looking too sterile so I used some yellow foam sealant to simulate the muddy pulp hornets regurgitate as an adhesive. I gave it a light coat of metallic gold paint and then another heavy coat of Glow in the Dark paint — especially on the cocoons. This photo is upside down, while everything dries on the porch.
Once complete, the nest will be mounted upside down across the top of Amanda & Sushi’s living room. The 2×4′ panel bowed at first, so I glued and screwed it to a particle board plank. The lighting looks super cool and dramatic. I used two cans of Glow in the Dark spray paint for the insides of the combs, and any outside portion that’ll face the camera. The LED controller can make the lights pulse or “breath.” And when the purplish lights are off, the tubes continue to glow neon green. Will post video of that later, as WordPress makes that very difficult for some stupid reason.
Today I received the 1.8mm Flickering Warm Light LED kit I ordered from evandesigns.com — an amazing little company. So I’m finally ready to make a dozen Chapstick candles for Act 7 of my movie POSERS. And here’s how I did it:
The first thing to know is that before running the LED wires up the center of the tube, we have to remove the plastic screw that acts as the core. This is a very delicate operation, as we need to preserve the wax intact without crushing or melting it. So step 1 is to uncap the tube, and turn the base dial all the way until it stops.
Now, with a 1/8” drill bit, we hold the tube firmly and drill out the base. If done dead center, this will sever the base dial from its plastic screw. Note the paper towels in the background. You don’t want your fingers to get waxy. Also you don’t want the label to slip. So hold the tube above the label.
Here you can see the base dial comes off. We’ll glue that back on later. Inside the tube, you can see the broken screw core. This will likely remain loosely attached to the plastic cup that holds the wax. Sometimes everything will fly out but usually you have to push it out. I used a pointed wooden skewer, about 1/8” in diameter. But you could probably use a small Phillips screwdriver.
Remember to never pull the wax. You can only push it or it will deform and break into a mess. Here are the parts of a Chapstick tube, lined up. You can throw the broken screw (just the shaft) away.
Okay, now set the tube upright (without the base dial), and carefully reinsert the wax, cup first. Use the cap to apply even pressure. The cup will resist at first, but then it will snap. We want about 1/8” of the wax to remain exposed at the top, like a real candle. If you push too far, use your stick to push it back up from the bottom hole.
Now we need to make a hole in the top of the wax, that will connect to the hole vacated by the plastic screw we removed. This is easy if the wax got a little soft from all the friction. You can just poke it with a stick. Do this gently — but if the wax starts to break, stop and use your 1/8” drill bit on slow speed instead.
Now hold the tube up to a light and make sure the hole is clear. If not, gently use your skewer again, twirling as you go so as not to move the wax up or down.
Now we’re ready to install the light. Straighten the red and black wires together and twist them if necessary. Easier said than done since you only have two hands and the assembly so far is fragile. We want the bulb to sit about 1/8” above the wax. This is mostly for effect, to simulate a candle flame. But also, we don’t want even the slightest amount of heat to cause our wax to slide down the tube and out of view.
Now we’re ready to glue the base dial back on. Carefully turn the tube upside down and thread the wires through the hole in the base dial. Secure it in place with a couple drops of Loctite 495 or other Superglue. We don’t need the dial to turn anymore. Once the dial is set (about a minute), add one more drop of glue to the hole to set the wires at our desired bulb height. On a few of my candles, this didn’t work so I used a hot glue gun. I was reluctant to do that at first because everything is heat sensitive.
Okay, that’s it for the candles themselves. Here you can see I made twelve. 3 cherry (red), 3 spearmint (green), 3 moisturizer (blue), and 3 strawberry (pink). Be sure to let the glue set a while and then check each bulb again for slippage.
The LED light wires are bare, so my next step was to thread them through some wooden stands I drilled and stained. These are 3” tall stands I found on Amazon. They had 1/2” holes so I had to enlarge them with a 5/8” bit — the diameter of a Chapstick tube. Then I drilled a 1/4” hole down the center to accommodate my wires. I broke a couple stands so be sure to order extra. Since I don’t have a drill press, the trick is to hold them in a small bench vise, drill halfway from the top, then halfway from the bottom. Turns out a 1/8” bit would have sufficed. I set each tube in a stand using hot glue, being careful to keep them straight. Note that the wires are thin enough to just cut a groove in the bottom of the stand. But on my movie’s bedroom set, I drilled holes in my plywood floor where I’ll connect all the wires underneath and out of the camera’s view.
The flickering effect on each candle is amazing! Will post video of that later.
This is another highly technical shot that will last 304 frames (12.67 seconds), animated on twos. The action is timed to sync with the bass line in the music, at either 38 or 76 frames per phase.
It’s a MOCO shot where the camera starts off normal but then corkscrews, swings, bounces and defocuses with increasing intensity each time Amanda Münschon uses her Taser on Donald Trump — whose reputation precedes him.
With each zap, Donald’s colostomy bag will inflate bigger and bigger, filled with digested food waste while he yells nonsense. Just like at Mar-a-Lago, I would guess.